** Legacy Documentation for Statseeker v5.6.1 **
Index
- Overview
- Requirements
- Create an OpenStack Image
- Create an OpenStack Instance
- Statseeker Server Configuration and Licensing
- Run Network Discovery
- Apply Service Packs
Overview
Statseeker is available for a cloud-based deployment via a public, or private, OpenStack service. This document provides an overview to the process required to, and highlights the key considerations for, creating an OpenStack Statseeker deployment.
The Statseeker specific requirements, and considerations, presented here will always be accurate.
To deploy Statseeker to an OpenStack cloud we will use a Statseeker *.qcow2 image file to build an OpenStack image and create an instance from that OpenStack image.
Requirements
This process requires that you have:
- A Statseeker installation *.qcow2 file, available from Customer Services
- License details for your Statseeker Installation, contact your Regional Sales Manager for details
- Access to an installed, and configured, OpenStack cloud environment
Create an OpenStack Image
To create your Statseeker OpenStack image:
- Log in to your OpenStack environment
- Select Images
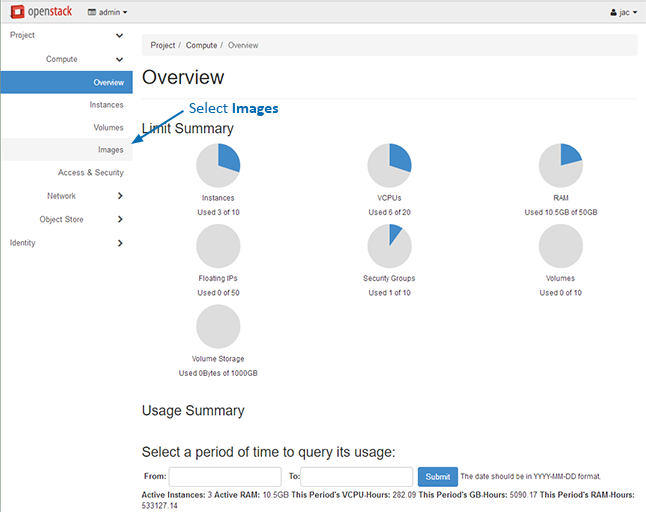
This will display the images screen.
- Click Create Image
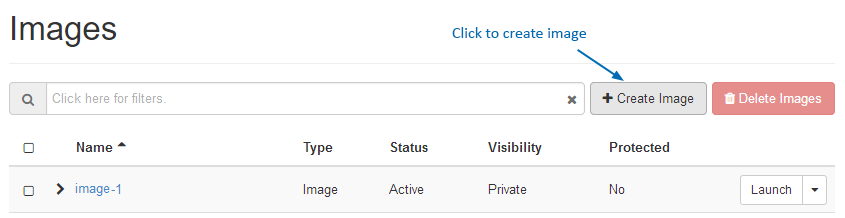
The image configuration screen will be displayed.
- Assign a Name for the image
- Under File, click Browse and locate your previously downloaded Statseeker installation *.qcow2 file, this will upload your selected image file to the OpenStack server
- Set Format to QCOW2
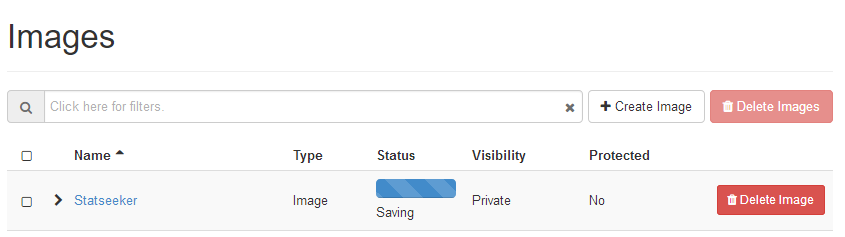
- Set Image Sharing: Visibility/Protection as needed for your environment and click Create Image

The newly created image configuration will be saved.
Create an OpenStack Instance
Once you have created a Statseeker OpenStack deployment image:
- Select Images in the side-menu to display the currently available images
- Click the Launch button associated with the Statseeker image that you previously created
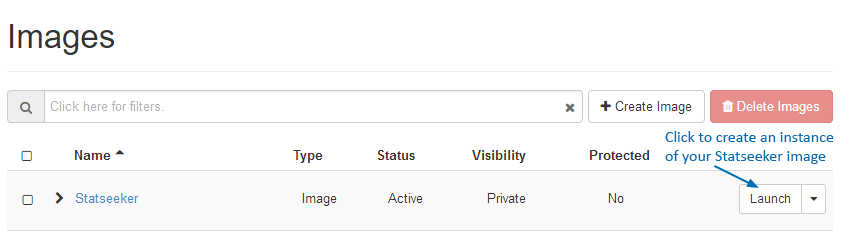
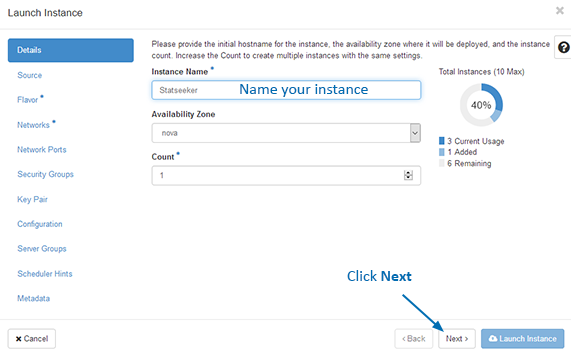
This will display the Instance configuration screen.
- Name your instance
- Assign a zone as required by your environment and click Next
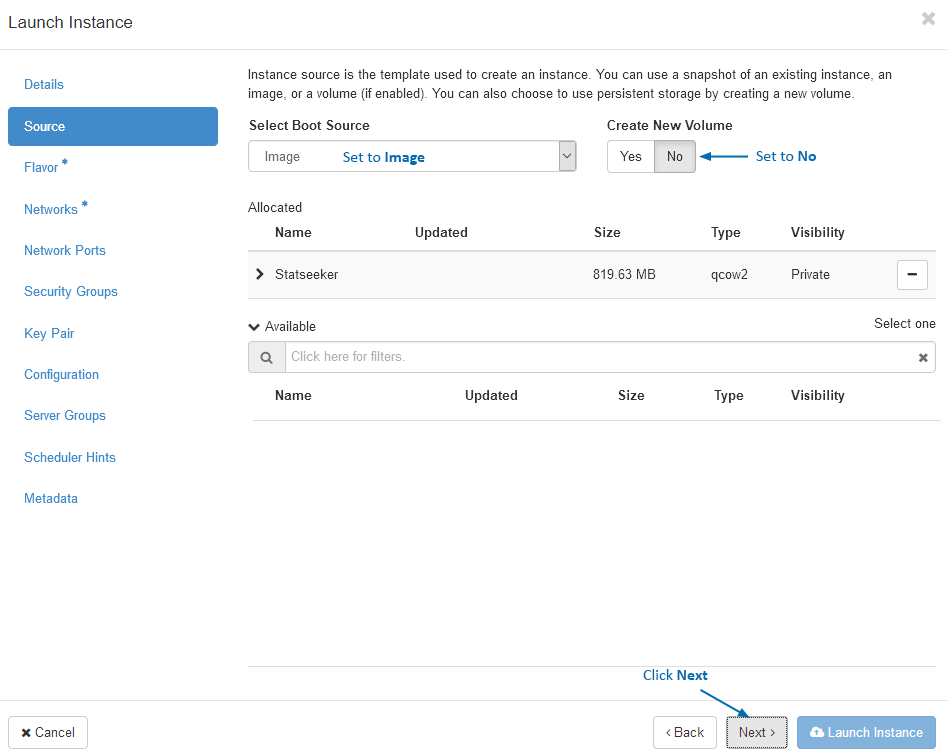
- Set Boot Source to Image
- Set Create New Volume to No
- Under Source, click the + button to allocate your Statseeker image
- Click Next
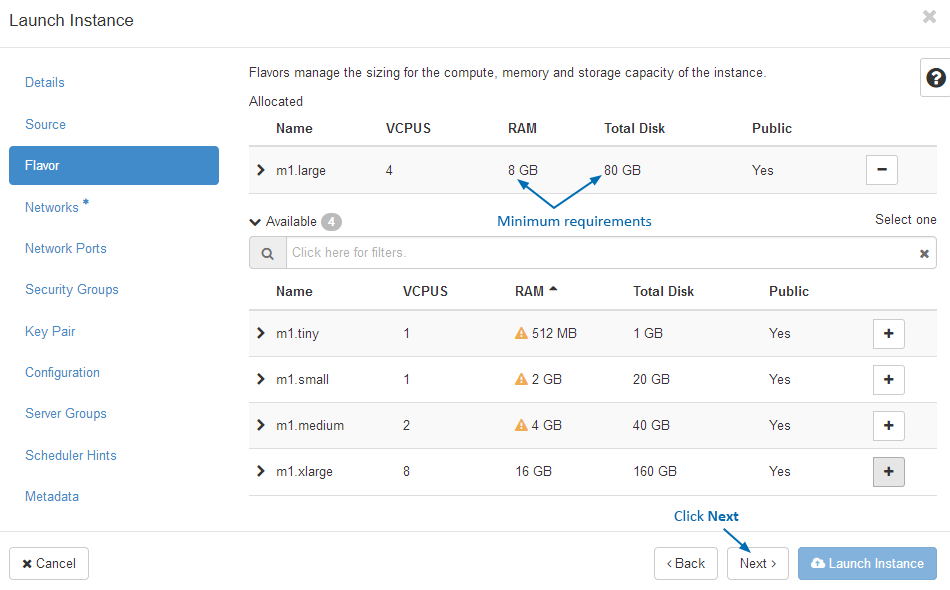
- Select the server size most suitable to your network size, see System Requirements for details
- Click Next
- Click the + button to allocate public/private network configurations as required by your needs
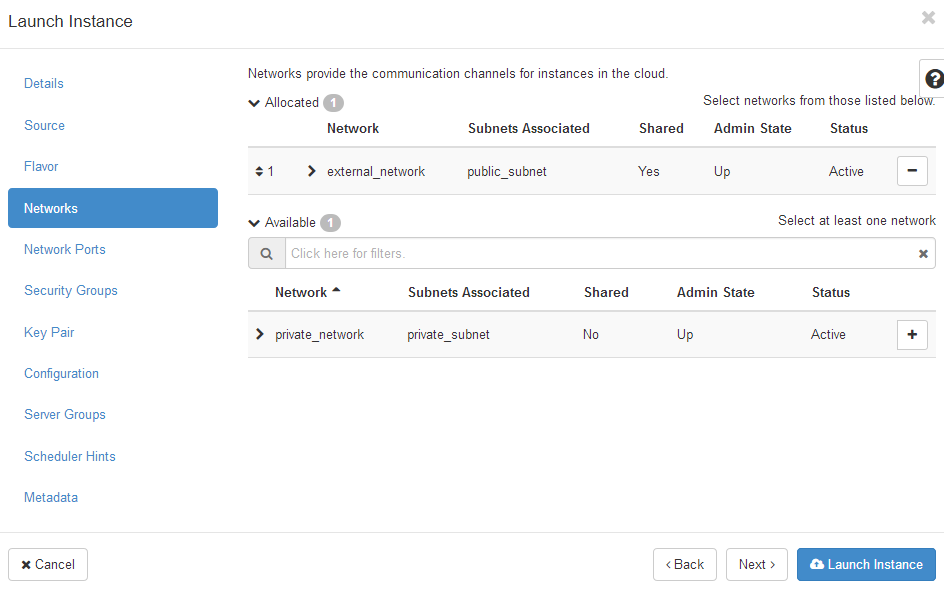
This completes the minimum requirements to get a Statseeker OpenStack deployment up and running. From this point, you can optionally continue to configure the instance to assign additional ports, security groups, ssl keys, etc., as required by your needs. Once done:
- Click Launch Instance
The instance will be launched, the progress through this process is displayed.
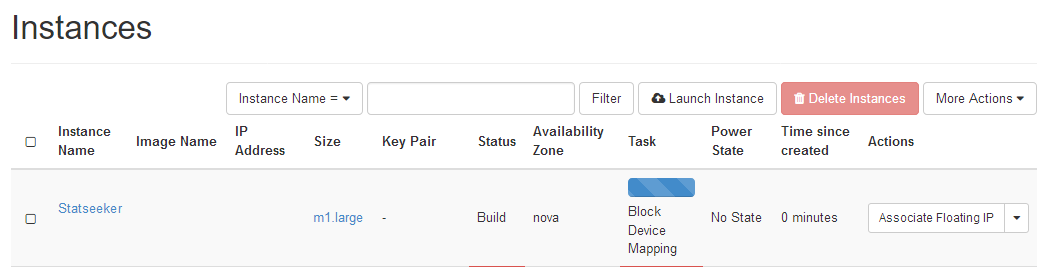
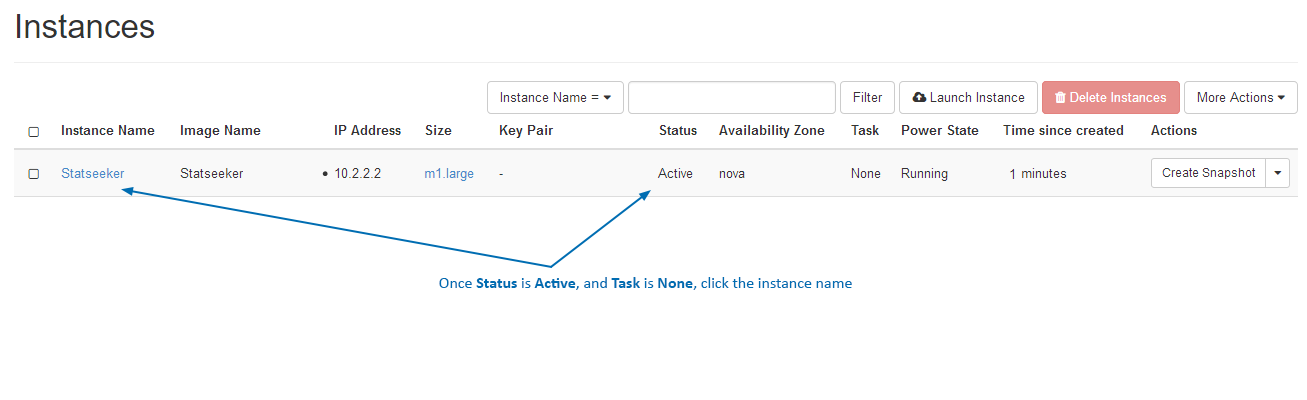
Once the build process is complete (Status is Active, Task is None):
- Click the instance name to view the overview for that instance
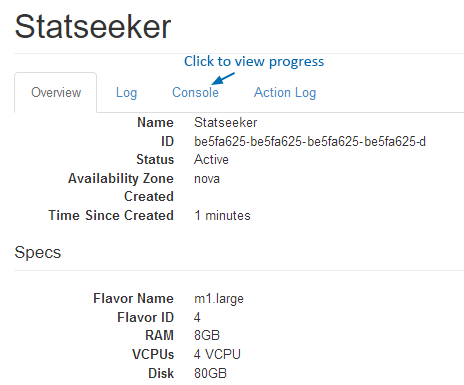
The server instance is built and Statseeker is currently being installed.
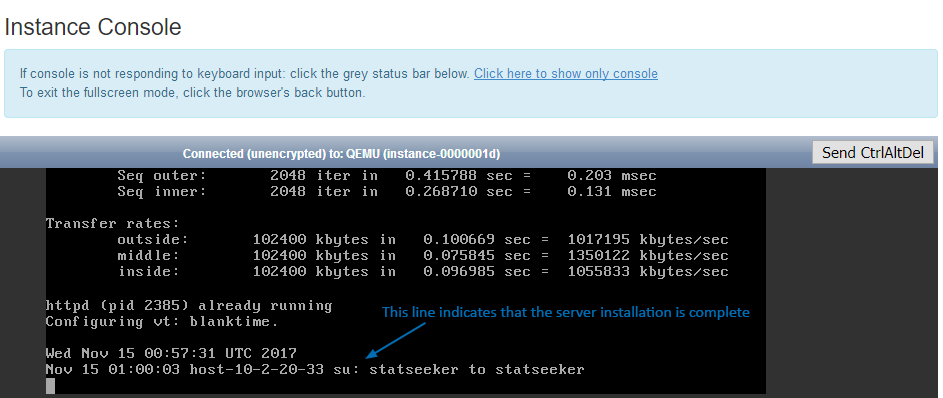
- Select the Console tab to view the current progress of the Statseeker installation
The installation will only take a few minutes. Once you see the process switch to the Statseeker user (su: statseeker to statseeker)
You now have the option to:
- Conduct required server administration tasks via the ssadmin command line tool, and then license your server via the web interface
- License your server via the web interface, and then conduct required server administration tasks via the web interface
See Statseeker Server Configuration and Licensing for details on this and the credentials required to access the functionality.
Statseeker Server Configuration and Licensing
Your Statseeker server has been configured with the required administration user accounts, these are:
- admin – the web user administrator account
- statseeker – the system user account used by the Statseeker application
- root – the superuser account in the backend operating system
The default password for each of these accounts is statseeker.
Server Administration Tasks
The following server administration tasks should be performed:
- Update account passwords
- Configure NTP, web, and mail servers
These tasks can be performed from the command line via the ssadmin tool, or from the web interface.
To access ssadmin:
- ssh into the Statseeker server as the statseeker user
- Follow the ssadmin Server Configuration Utility guide
To configure your server from the web interface you will need to first, license your server (see Statseeker Licensing for details), then use the Administration Tool to configure your server as needed:
- Update default account passwords – OS Configuration
- Configure NTP – Date/Time/NTP Configuration
- Configure web server – Web Server Configuration
- Configure mail server – Email Configuration
Statseeker Licensing
Once Statseeker is installed you can access the web interface at the IP address displayed against the OpenStack instance:
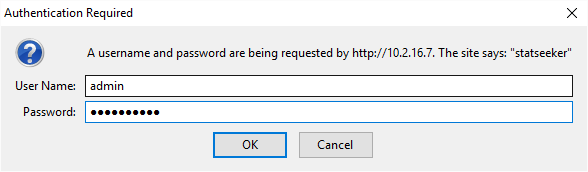
You will then be prompted with a login screen.
- User Name = admin
- Password = if you have not updated the admin account password, you can use the default password of statseeker
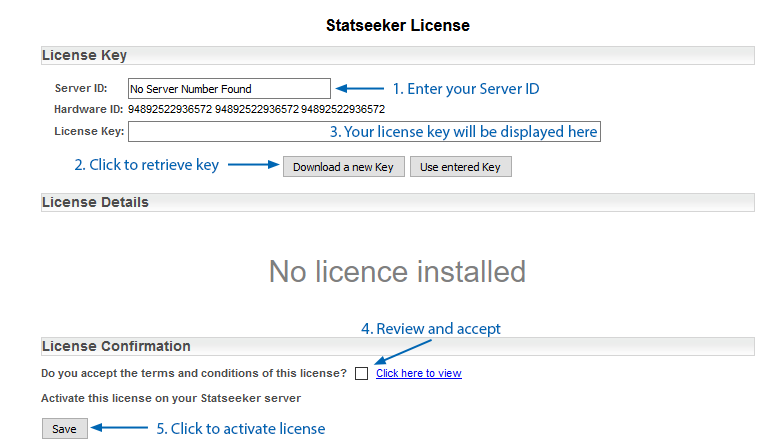
Once logged in to the web interface, you will be prompted with the Statseeker License configuration screen.
- Enter your Server ID and select Download a new Key
It may take a minute to obtain your license key.
- Select the checkbox to accept the Statseeker license
- Select Save to activate the license key
The screen will update to display the license details.
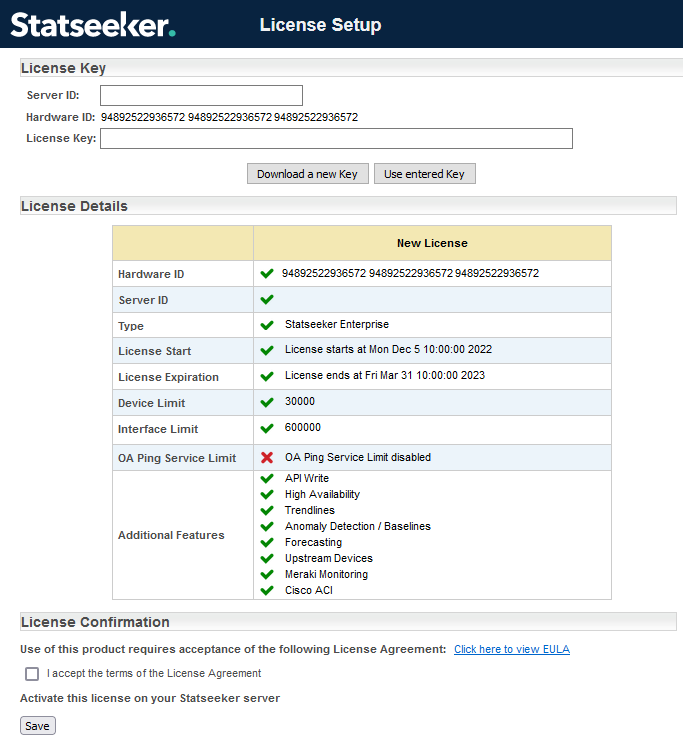
- Click Next
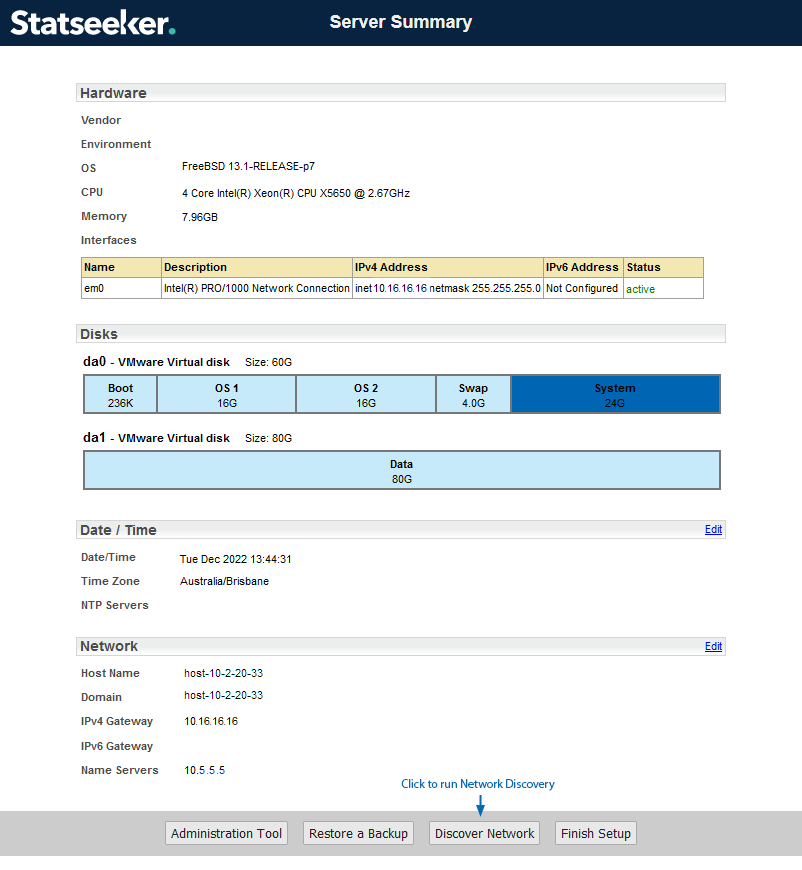
You will now be presented with the Server Summary screen, containing a range of details pertinent to your Statseeker installation.
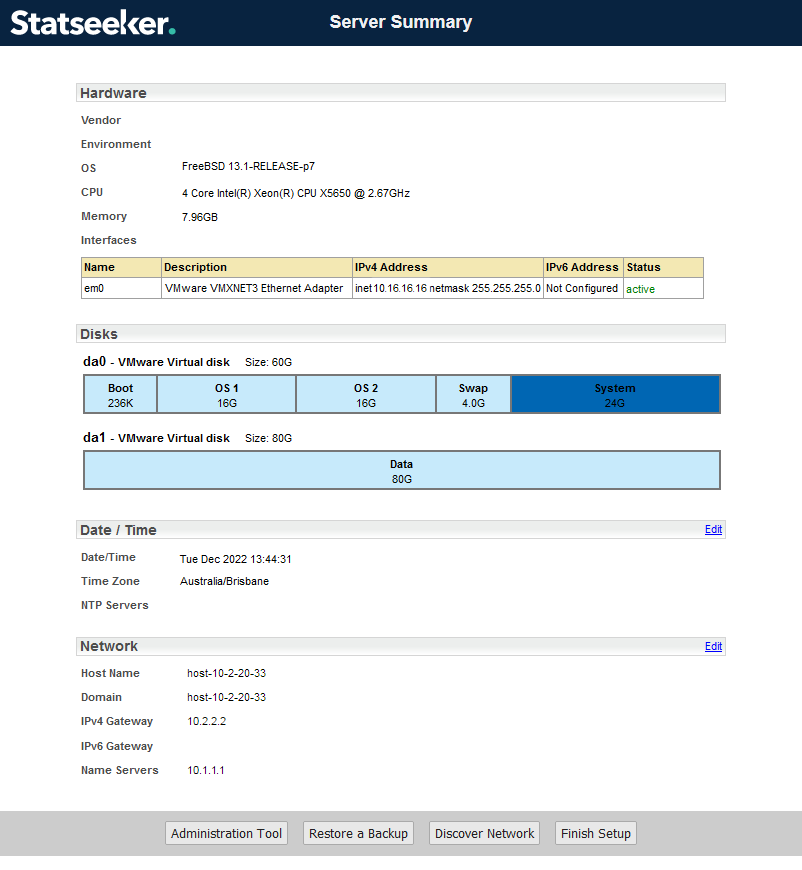
Edit Server Date/Time and NTP Configuration
To edit the server date/time settings:
- Click the associated Edit link on the Server Summary page
- Use the calendar control to edit the date and/or time
- Use the drop-down to modify the timezone for the server
- Click Save when done
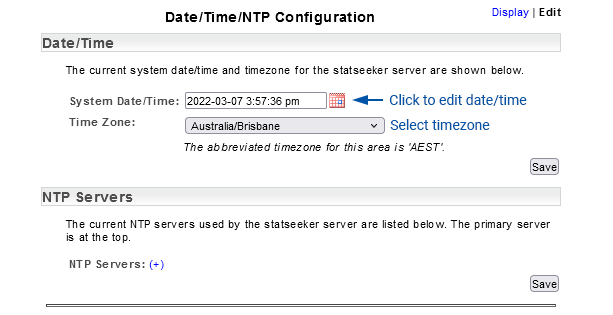
The configuration changes will be saved, and the server will be restarted to apply those changes.
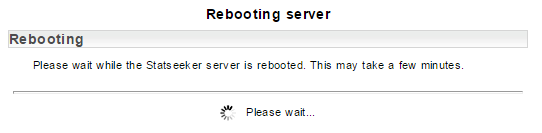
Once the changes have been applied you will be returned to the Date/Time/NTP Configuration screen (in Display mode) to confirm that the changes have been applied correctly.
Edit NTP Configuration
To edit the NTP server settings:
- Click the associated Edit link on the Server Summary page
- Enter the address of the NTP server to use
- Click the associated Delete button to remove unwanted NTP server entries
- Click Save when done
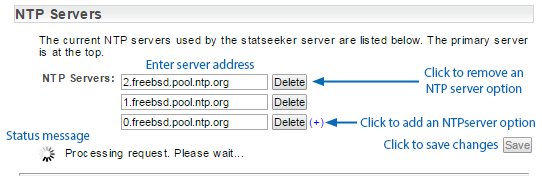
When you click Save Statseeker will attempt to contact the specified NTP servers and:
- Inform you if it is unable to receive a response from the NTP server, no changes have been applied at this point
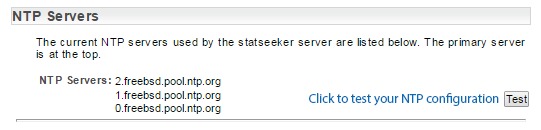
- If it receives a valid response from the NTP server, apply the changes and return the Date/Time/NTP Configuration screen (in Display mode), enabling a Test button that can be used to confirm the validity of the current configuration.
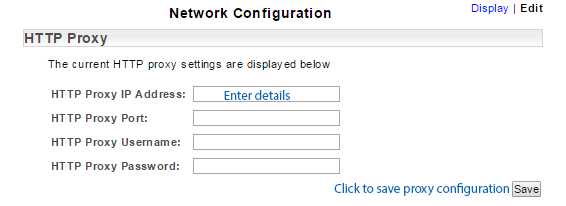
Configure an HTTP Proxy Connection
To add or edit the HTTP proxy configuration:
- Click the Network > Edit link on the Server Summary page
- Enter the required proxy server details
- Click Save to apply the configuration
Run Network Discovery
Statseeker’s network discovery process is used to add networked devices, interfaces, and other SNMP enabled components on your network to Statseeker. Statseeker can then collect configuration information and timeseries data from those devices to be used for polling, reporting, and alerting purposes. There are several methods that can be used to direct the discovery process towards the devices on your network that you want Statseeker to report on, for details see:
- SNMP Discovery
- Add A Single Device
- SNMP Device Filtering
- Adding SNMPv3 Devices
- Adding Ping-Only Devices
IPv6-Only Networks
The Discovery option available from the installation screen is limited to Discovery Using Ranges, so it is not compatible for IPv6-only networks. For IPv6-only networks:
- Select Finish Setup
- Select the Admin Tool from the main navigator and discover your network using one of the other discovery options, see Statseeker Network Discovery for details.
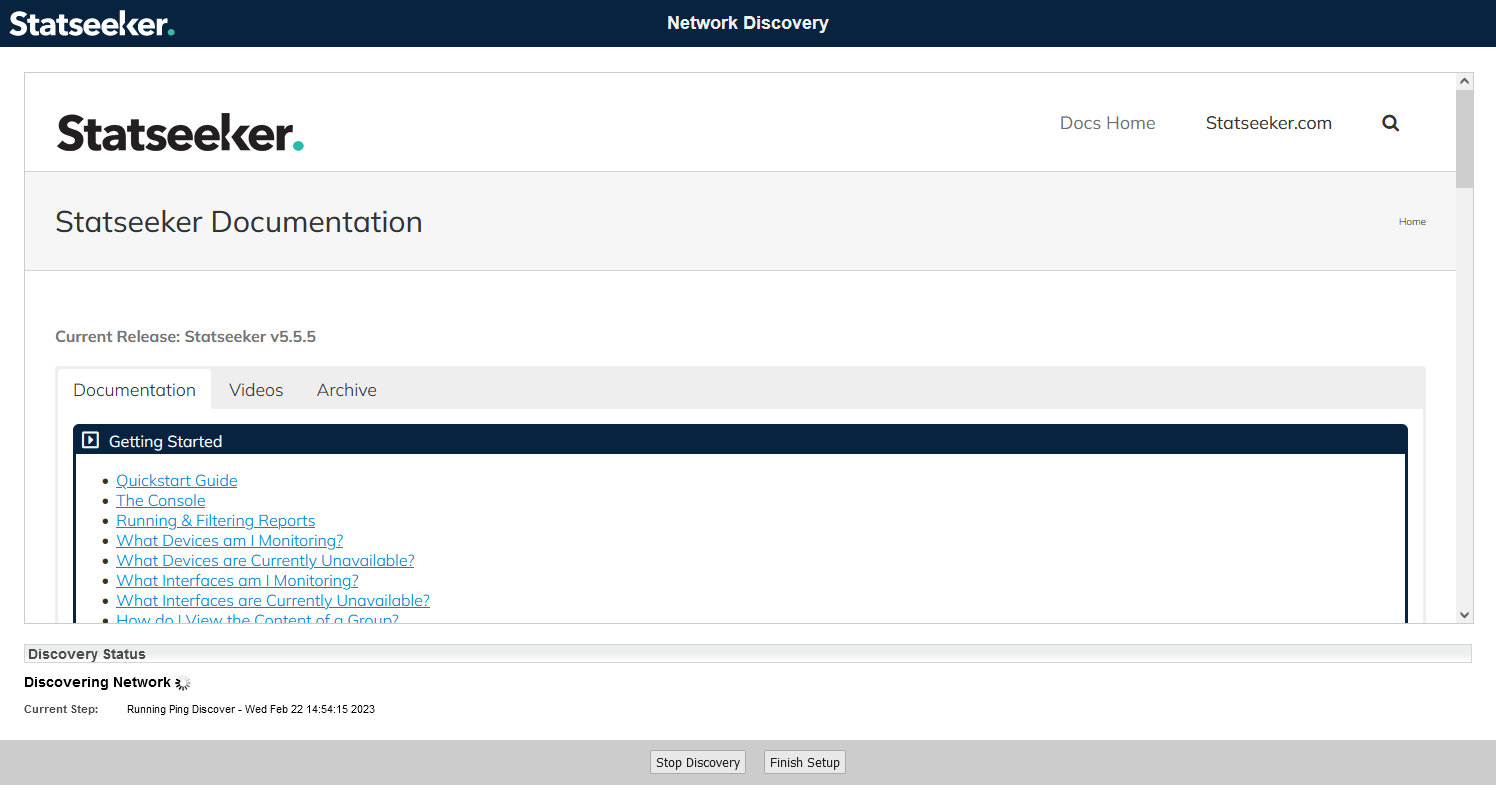
IPv4 Network Discovery
- Click Network Discovery
- Click Start Discovery

- Enter the SNMP Community Strings for the devices that you want Statseeker to discover. Multiple community strings may be specified, one per line.
- Define the Network Discovery Ranges that you wish Statseeker to query

Once the discovery process is active and running there is a progress wheel in the bottom left-hand corner of the screen that will indicate when the discovery process is complete.
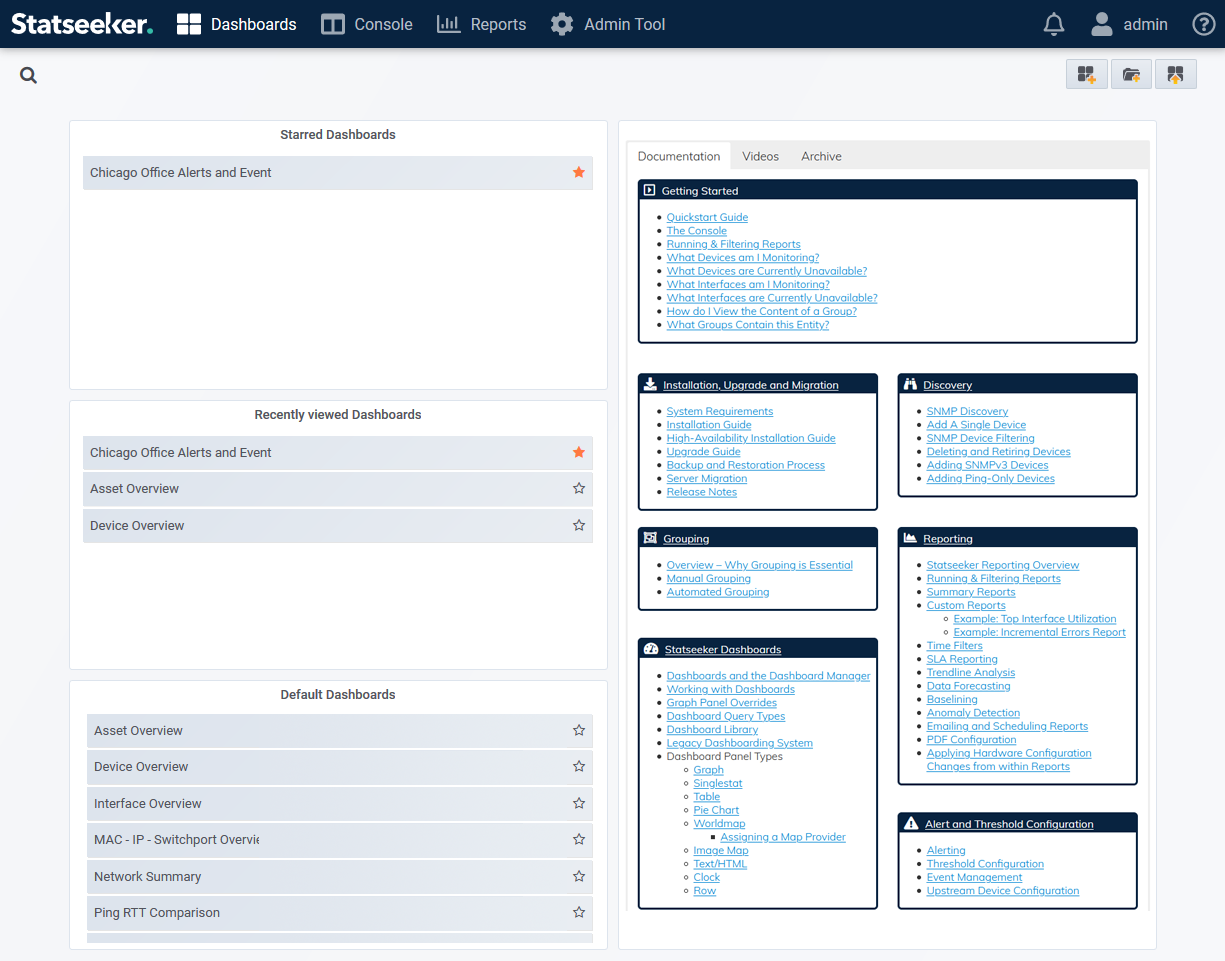
- Once the discovery process has completed, click Finish Setup
The Statseeker Dashboard Homepage will be displayed providing access to the default dashboards as well as a news panel detailing recent updates with links to associated documentation and videos. The main Statseeker Console and reporting panels are available from the main navigator.
Apply Service Packs
Check for and apply any Service Packs applicable to your version of Statseeker. Contact Customer Support if you require any assistance.