Index
- Overview
- Enabling HTTPS
- Redirect HTTP to HTTPS
- Editing the cipher List
- Allowed TLS Versions
- Authentication Token Settings
- SSL Certificates
- API Authentication Method
- Allowed Frame Ancestors
Overview
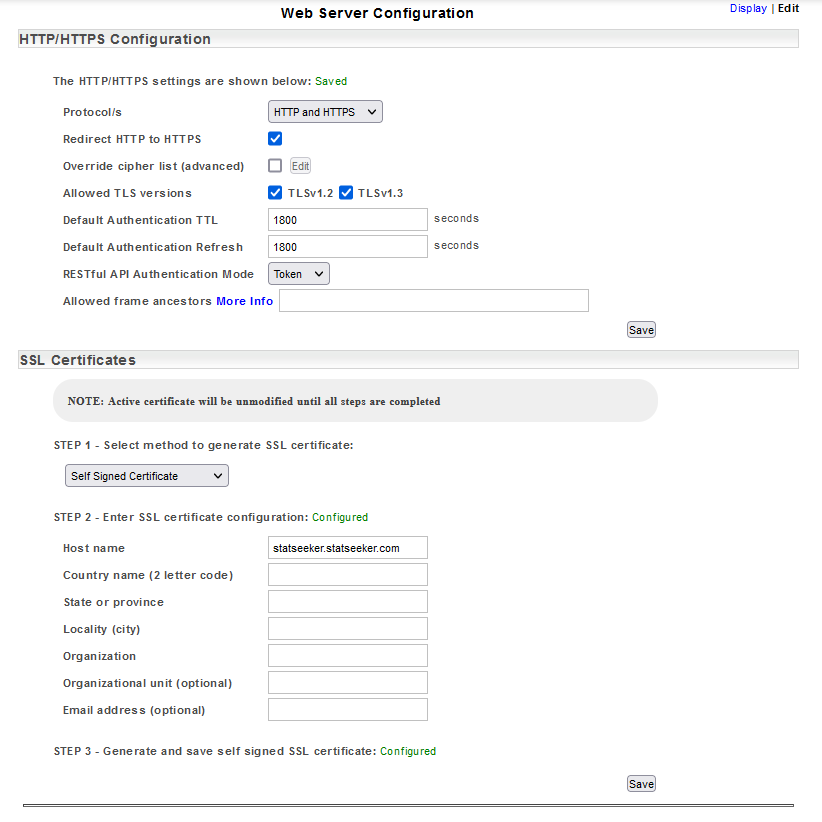
A Statseeker installation includes a configured and enabled web server to deliver the Statseeker User Interface. By default, a fresh install of Statseeker will:
- Accept both HTTP and HTTPS
- Redirect all HTTP connection attempts to HTTPS
- Be configured with a self-signed SSL certificate
- Allow both TLS v1.2 and 1.3
- Have both Token TTL and Refresh periods set to 30 minutes
- Have the API authentication method set to Token
[top]
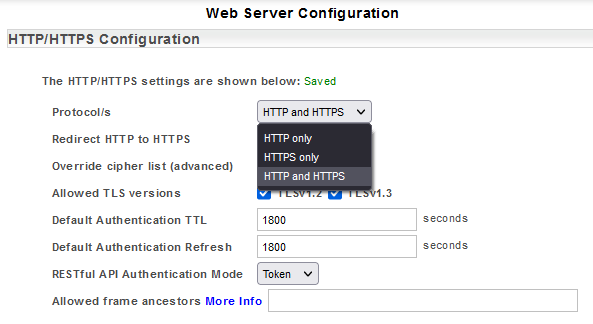
By default, currently supported Statseeker versions are installed with both HTTP and HTTPS enabled, and redirect HTTP traffic to HTTPS. Servers installed from earlier versions and then upgraded may still be running in HTTP in some instances. To enable HTTPS: The web server will: [top]
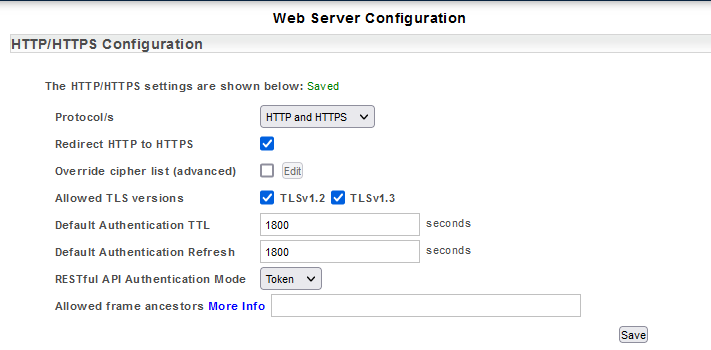
The web server configuration allows you to redirect all HTTP connections to HTTPS. To configure this redirection: This is an advanced feature and should only be used in accordance with well understood requirements to respond to very specific needs. To edit this list: By default, the Statseeker server supports communications using both Transport Layer Security (TLS) v1.2 and 1.3. This support may be restricted by: Statseeker offers token-based authentication, with users being authenticated via the following methods: When employing File, LDAP or RADIUS authentication, the Authentication Token TTL (time-to live) and Refresh periods are specified in the Web Server configuration. Statseeker provides for setting default Token TTL and Refresh periods, as well as user specific overrides to these values. To update the default Authentication Token TTL and Refresh settings: On Save, the Statseeker web server will be restarted with the updated settings applied. User specific overrides can be set from within the Statseeker User account, see Editing Users and Updating User Preferences. The Statseeker web interface is delivered via the Statseeker web server. An installed SSL certificate is required for HTTPS connections to the web server and Statseeker allows you make use of either a self-signed certificate, or a certificate signed by a signing authority. If Statseeker (version 5.4.2 and above) cannot locate an SSL certificate, it will create a self-signed certificate during the install/upgrade process which can be used for HTTPS connections. You can use this self-signed certificate, upload another existing certificate, or create a certificate signing request to be passed to a signing authority to create a signed certificate. To create a self-signed certificate:Enabling HTTPS
Redirect HTTP to HTTPS
Editing the cipher List
Allowed TLS Versions
Authentication Token Settings
Editing Authentication Token Settings
Edit Default Token TTL and Refresh Periods
Apply/Edit User Specific Token TTL and Refresh Periods
SSL Certificates
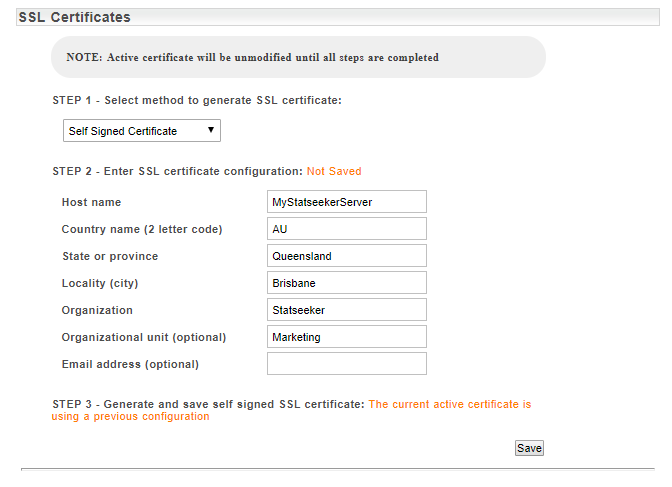
Creating and Installing a Self-Signed Certificate
| Field | Description |
| Host name | The host name of the server |
| Country name (2 letter code) | Two-character ISO format country code |
| State or province | State or province in which the company is registered/licensed |
| Location (city) | Location/city in which the company is registered/licensed |
| Organization | Legal name under which the organization was registered/licensed |
| Organizational Unit (optional) | The organizational unit within the company e.g. Marketing |
| Email address (optional) | An email address to be associated with the management of this certificate |
- Configure the certificate information as needed and click Save
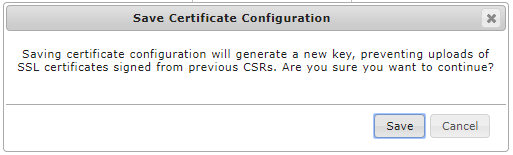
A confirmation prompt will be displayed, advising you that updating the active certificate will initiate a web server restart. This does not affect Statseeker’s ability to monitor your network but will result in the web interface being unavailable until the reboot is complete (typically, 10-30 seconds).
Creating a Certificate Signing Request (CSR)
A certificate Signing Request is required to generate an SSL certificate from a third-party certificate signing authority (CA). A certificate from an established and recognized CA will be interpreted by browsers as a ‘trusted’ certificate, and consequently, that your Statseeker server web interface is a trusted destination.
When creating a CSR, Statseeker first generates a private encryption key, then generates the CSR using this private key. You then pass the CSR on to a trusted CA, and they will supply the signed certificate to use with your server. The resulting certificate is generated to work with your private key, consequently, Statseeker will prevent the uploading of SSL certificates that have been generated in response to another signing request i.e. utilizing a different private key.
To create a CSR:
- Select Administration Tool > Statseeker Administration > Web Server Configuration
- Click Edit (top left corner)
- Select Certificate Signing Request from the SSL Certificates > Step 1 drop-down

| Field | Description |
| Host name | The host name of the server |
| Country name (2 letter code) | Two-character ISO format country code |
| State or province | State or province in which the company is registered/licensed |
| Location (city) | Location/city in which the company is registered/licensed |
| Organization | Legal name under which the organization was registered/licensed |
| Organizational Unit (optional) | The organizational unit within the company e.g. Marketing |
| Email address (optional) | An email address to be associated with the management of this certificate |
- Configure the certificate information as needed and click Save
A confirmation prompt will be displayed, advising you that creating the signing request will prevent the uploading of SSL certificates that have been generated in response to another signing request.
- Confirm the creation of the CSR by clicking Save
The CSR will be saved to /home/system/etc/ssl_new on the Statseeker server. Certificate authorities will allow you to either upload a CSR or paste the content of a CSR into a field. Either way, the CSR will then be used to generate a signed certificate which you can, in turn, download and use to secure your Statseeker server.
- Select Step 3 > View or Download as needed to retrieve the CSR
- Provide the CSR to your selected certificate authority
Once you have received your signed certificate from the CA you can upload the certificate to your Statseeker server, see Upload a Signed Certificate
Upload a Signed Certificate
Your selected Certificate Authority will respond to your certificate signing request with a signed certificate that can be uploaded to your Statseeker server.
To upload a signed certificate to your Statseeker server:
- Select Administration Tool > Statseeker Administration > Web Server Configuration
- Click Edit (top left corner)
- Select Certificate Signing Request from the SSL Certificates > Step 1 drop-down
- Select Browse, locate and select your signed certificate
- Click Upload Certificate
- Once uploaded, click Save to restart the web server
No changes are made to your existing certificate configuration prior to successfully uploading a new signed certificate and then clicking Save. Once you click Save, the existing configuration is discarded, and the new certificate and key will be used by your Statseeker server.
Upload a Signed Certificate and Private Key
This process is used when you have an existing signed certificate and its associated private key. To upload:
- Select Administration Tool > Statseeker Administration > Web Server Configuration
- Click Edit (top left corner)
- Select Upload Certificate and Key from the SSL Certificates > Step 1 drop-down
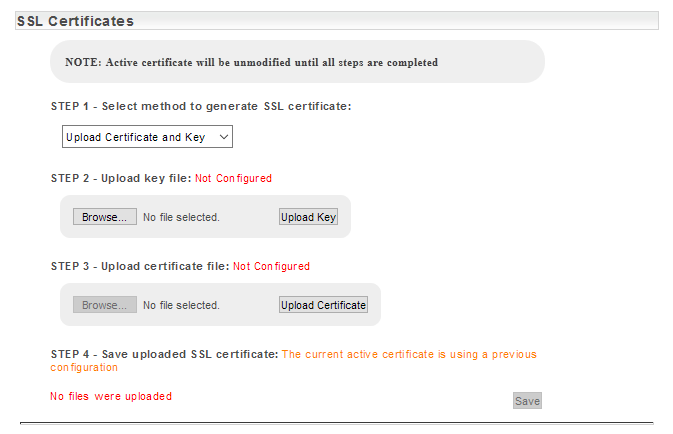
- Select Browse, locate and select your private key
- Click Upload Key
- Select Browse, locate and select your certificate
- Click Upload Certificate
- Once uploaded, click Save to restart the web server
No changes are made to your existing certificate configuration prior to successfully uploading a both the key, and the signed certificate, and then clicking Save. Once you click Save, the existing configuration is discarded, and the new certificate and key will be used by your Statseeker server.
API Authentication Method
The authentication method used to communicate with the Statseeker API is independent of that used for user authentication with the GUI. The authentication methods available are:
- Token – (json web token based authentication) default value for new/fresh installations
- Basic – (HTTP basic access authentication) default value for servers upgrading from 5.5.3 and earlier
For details on employing these authentication methods in your API requests (including sample code) see API Authentication.
Allowed Frame Ancestors
The HTTP Content-Security-Policy (CSP) header allows content owners to control what resources a browser is allowed to load for a given URL, this is a security measure to guard against cross-site scripting attacks. Frame Ancestors is one of the navigation directives which can be configured in a web page’s CSP header and is used to specify which ‘parent’ URLs can frame (embed/contain) that page. The Statseeker server’s Frame Ancestors directive specifies which 3rd-party web resources are allowed to display Statseeker content within a frame, iframe, or similar container.
Configuring Frame Ancestors
Configured frame ancestor directives are added to the CSP header for every page that the Statseeker webserver provides. The URLs specified in this directive are white-listed and are allowed to contain Statseeker content. To whitelist URLs:
- Select Admin Tool > Server Administration > Web Server Configuration
- Click Edit (top-right)
- Enter URLs in the Allowed Frame Ancestors field (multiple values should be ‘space’ separated)
- Click Save, the web server will be restarted, and the rule will be enforced
Syntax
- A space separated list of content hosts by name or IP address
- Optional URL scheme (http/https) and/or port number
- Optional leading and/or port wildcard (*)
Examples:
- https://*.example.com – matches any subdomain of example.com using the HTTPS URL scheme
- store.example.com another.example.com – matches store.example.com or another.example.com
- mail.example.com:443 – matches only port 443 on mail.example.com