Index
- Overview
- Accessing ssadmin
- Navigating ssadmin
- Date, Time and NTP
- HTTP Proxy
- Network Configuration
- Software Upgrade
- Backup and Restore
- Passwords
- Operating System
- Reset
- Actions/Services
Overview
The ssadmin tool is a command line configuration utility for your Statseeker server. For details on accessing the server CLI, see Statseeker Server CLI.
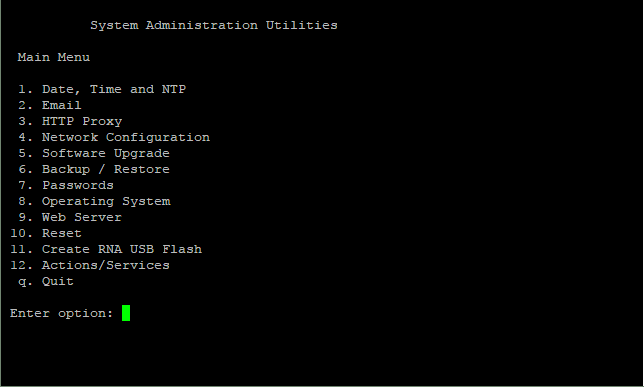
Much of what is available in ssadmin is also available from the Statseeker web interface, but there are some options that are only available from ssadmin. ssadmin offers configuration options for:
- Date, Time, and NTP Servers
- Email Server
- HTTP Proxy
- Network Configuration
- Upgrading the Statseeker Server
- Backup and Restore Processes
- Passwords
- Server OS
- Web Server
- Remote Network Appliances
- Server-Based Services
Accessing ssadmin
To access ssadmin:
- Log in to your Statseeker server via ssh or directly (See Statseeker Server CLI for assistance)
- From the command prompt enter ssadmin and enter the root user password if prompted
This will display the ssadmin menu, offering access to the different areas of functionality.
Navigating ssadmin
Navigating through the various menus in ssadmin is achieved by entering the number assigned to that menu option and use “q” (or enter as required) to return to the previous menu or quit ssadmin.
Example: display current NTP server configuration details, then return to the main ssadmin menu
- 1 – Date, Time and NTP
- 1 – Display date/time and NTP
- enter – return to Date, Time and NTP menu
- q – return to Main menu
Some configuration options will use default OS based dialogs which require the use of tab and the arrow keys to navigate the options provided, the same style of navigation as required to configure your server during the initial, installation process.
Regardless of which navigation method is required, simply follow the prompts to work your way through the selected configuration option. If any specific data format is required at any stage, it will be detailed in the relevant section below.
Date, Time and NTP
View, configure and test date, time and NTP server configuration.

- 3. Add NTP servers – requires an IP address, not a URL, i.e. 129.6.15.28, NOT time-a.nist.gov
View, configure and test email server configuration.
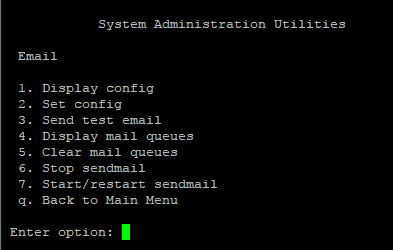
- 2. Set Config > SMTP Gateway IP Address – displays the current config and the option to update, and you can skip updating this by hitting enter
- 2. Set Config > Masquerade as – displays the current config and the option to update, you can enter a masquerade host (e.g. mail.statseeker.com) or press enter to skip
HTTP Proxy
View, configure and test proxy configuration.
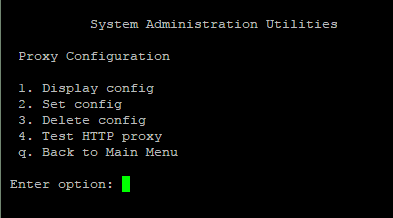
- 2. Set Config – displays the current config and the option to update proxy IP, port, username and password, these values are supplied at separate prompts
Network Configuration
View, configure and test network configuration.
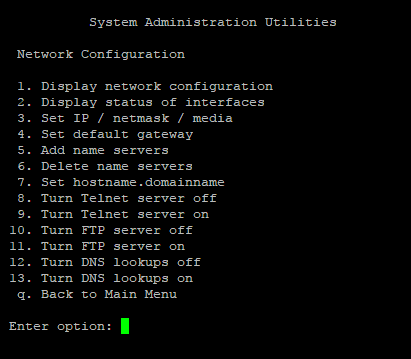
- 3. Set IP / netmask / media – displays the current config and the option to update, these values are supplied at separate prompts
- 4. Set default gateway – requires an IP address
- 5. Add name servers – requires an IP address
- If the hostname is updated, a rewalk should be initiated to update the configuration of services (syslog messaging etc.) that use the hostname
- When updating the network configuration, changes are only applied once you have exited from ssadmin (a reboot will be initiated)
Software Upgrade
Upgrade the Statseeker server to a newer version. This option requires either:
- A disk in the CD-ROM/DVD drive of the server
- A mounted Statseeker installation ISO
- A Statseeker installation ISO copied to the /home/system/cdrom directory
Triggering this process will:

- Prompt you for access to the image/install media
- Shut down all Statseeker services
- Apply the up, logging the process out to the CLI
- Restart the services when complete, again logging the process out to the CLI
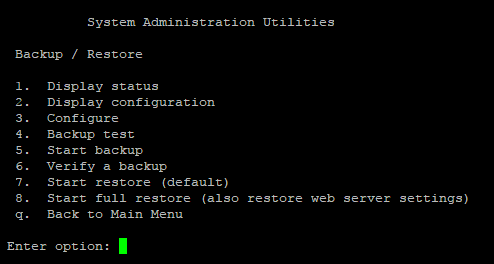
Backup and Restore
- View, configure and test the backup configuration
- Initiate a backup
- Verify a previously created backup to confirm that the backups are usable
- Restore your Statseeker server and webserver configurations from a previously created backup
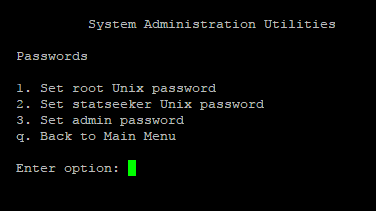
Passwords
Reset the password for the root and statseeker shell accounts and for the admin Statseeker user account.
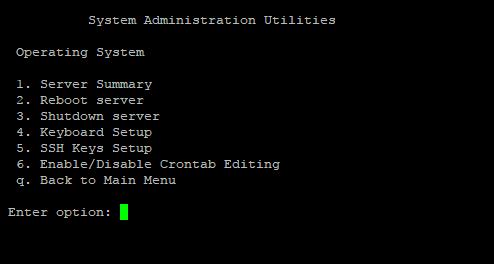
Operating System
Offers:
- Server hardware and configuration details
- Options to cleanly reboot and shutdown the server
- Ability to specify a keyboard configuration for interacting with the server on the CLI
- Ability to create and install signed certificate keys and signing requests
- Toggle the ability to edit the crontab
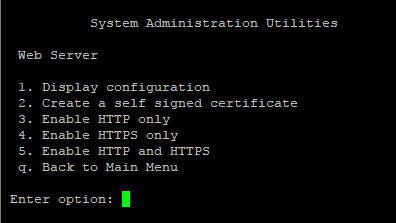
Web Server
Display the current web server configuration, create self-signed certificates, and toggle HTTP/S modes.
Reset
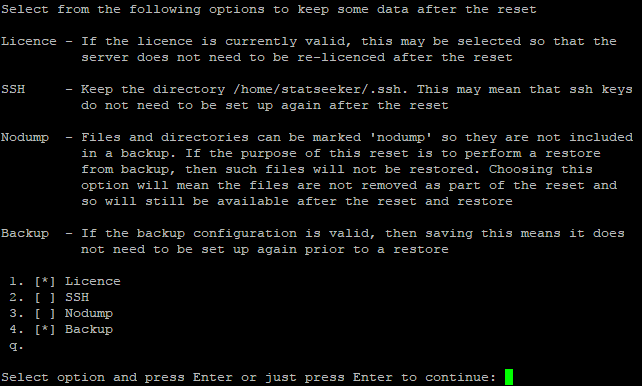
The reset functionality allows you to reset your Statseeker server to a default installation state, optionally keeping/wiping your:
- License key configuration
- Web server certificate configuration/s
- Statseeker configuration data
Selecting the Reset option will display the reset options and provide detailed information on the impact and use of those options. To specify one of more reset options:
- Enter the number associated with the option (as you would for navigation within ssadmin) and hit enter
This will display an asterisk (*) against the option denoting that it has been set.
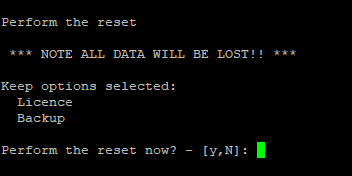
Once you have set the options that you want to use with the reset functionality:
- Press Enter to display the Reset Confirmation screen
- Confirm the action to proceed with the reset
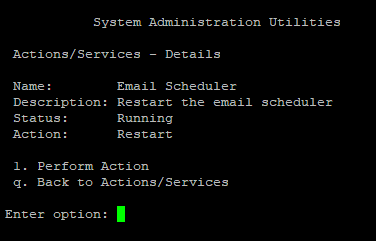
Actions/Services
Offers the ability to view the status and start/stop/restart a range of OS and Statseeker based services on your Statseeker server.
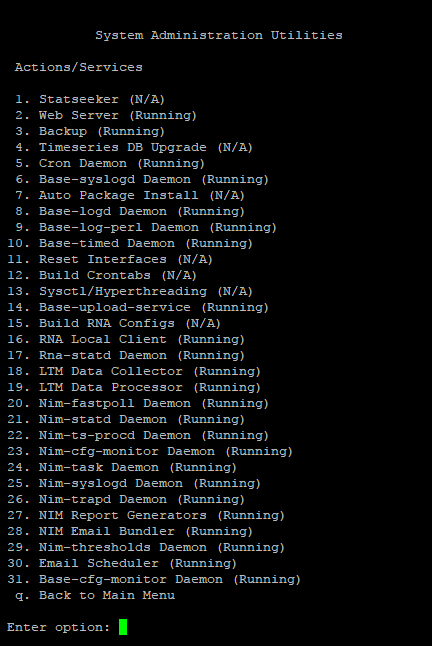
Selecting a service opens a details screen, specific to that service, and offers actions relevant to the current state of the service.