
** Legacy Documentation for Statseeker v5.5.5 **
Index
- Overview
- Requirements
- Format Installation File
- Upload Statseeker Installation File
- Create Image
- Create Statseeker Virtual Machine
- Server Licensing
- Update Default Passwords
- Network Discovery
- Apply Service Packs
Overview
Statseeker can be deployed to Google’s Cloud platform. This document details the process of creating a Google Cloud Statseeker deployment.
- Any screenshots presented, and processes described were accurate at the time of writing this document but may become out-of-date due to changes made to the Google Cloud platform
Requirements
This process assumes that you have a working knowledge of the Google Cloud platform and portal, and requires that you have:
- A valid Google Cloud subscription with access to Google Compute Engine services
- Access to a pre-configured Project, or permission to create a Project
- Access to a pre-configured Storage Bucket, or permission to create a Storage Bucket
- A Statseeker v5.5.5(+) installation image
- Depending on the format of the image, you may need access to a Linux system to re-format the image prior to use on the Google Cloud platform, see Format Installation Image for details
- A valid Statseeker license
For access to Statseeker files/licenses suitable for your needs, please contact:
- New accounts: your Regional Sales Manager
- Existing Statseeker Accounts: Statseeker Technical Support
Format Installation File
The Google Cloud platform expects the installation image used when configuring Compute Engine Services to be provided in a specific format. Depending on the Statseeker version you are intending to use, the installation image format provided by Statseeker will be either:
- A ready-to-use compressed TAR archive (*.tar.gz) – proceed to Upload Statseeker Installation Media
- A Statseeker VHD image (*.vhd) – see below
If you have a Statseeker VHD you will need to format this image prior to uploading to Google Cloud.
- Rename the VHD to disk.raw – Google Cloud explicitly looks for this file
- Tar and compress this image using a specific operation switch (requires access to a Linux system)
Use the following commands on a Linux CLI to rename and process the installation image:
# cp <your_statseeker_vhd_filename>.vhd  disk.raw
# tar --format=oldgnu -Szcf <output_filename>.tar.gz disk.raw
Example:
# cp statseeker.vhd disk.raw
# tar --format=oldgnu -Szcf statseeker.tar.gz disk.raw
Upload Statseeker Installation Media
The Statseeker TAR file created in the previous step needs to be uploaded to a Google Cloud Storage Bucket before it can be used to Statseeker server instances. We will be using the Google Cloud web-GUI for the remainder of the process, so ensure that the Statseeker TAR is accessible from your local machine.
- If you have a suitable storage bucket, then proceed to Uploading Installation Media
- If you need to create a storage bucket, proceed to Create Storage Bucket
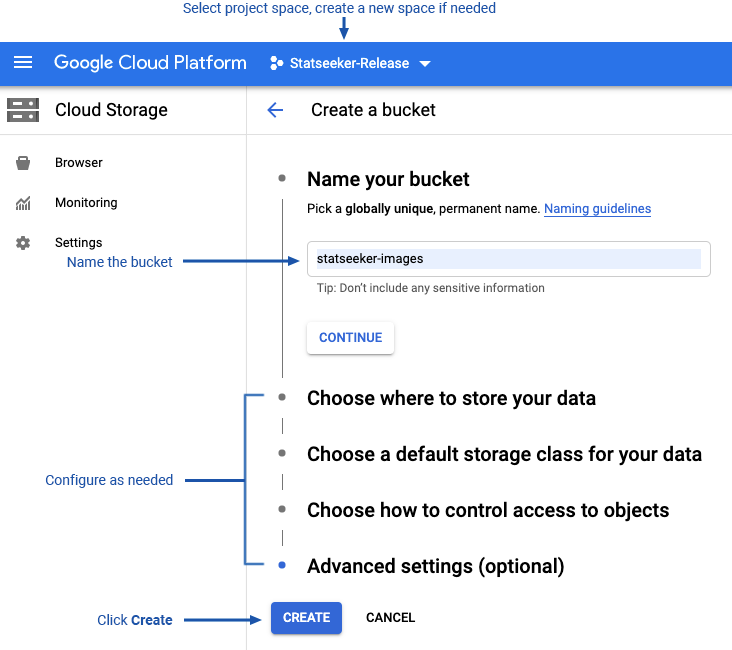
Create Storage Bucket
- Login to your Google Cloud Account
- From the main menu, select Cloud Storage and select your chosen Project
- Click Create Bucket and Name your bucket
- Set Location, Storage Class, and Access Control to suit your requirements
- Click Create
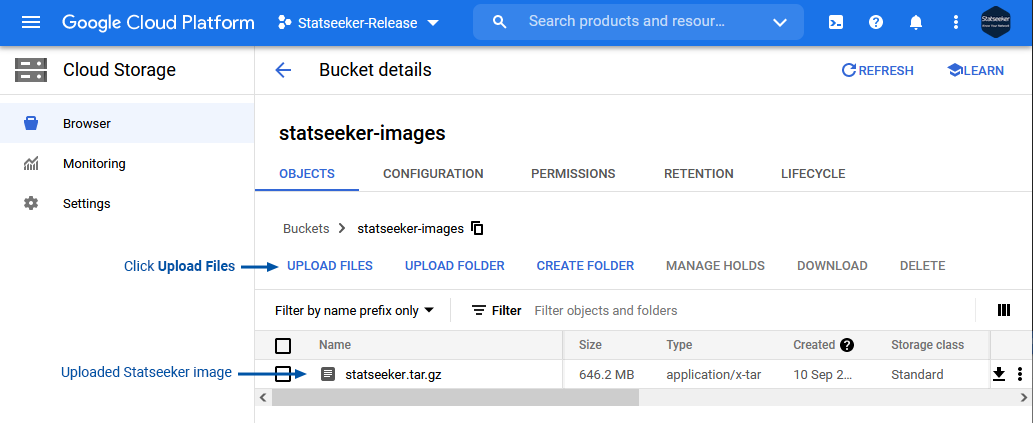
Uploading Installation File
- Login to your Google Cloud Account
- From the dashboard, select Cloud Storage and select your chosen Project
- Select the bucket that will contain the Statseeker installation file and click Upload Files
- Locate and select the Statseeker TAR
Once uploaded the Statseeker image will be displayed in the bucket.
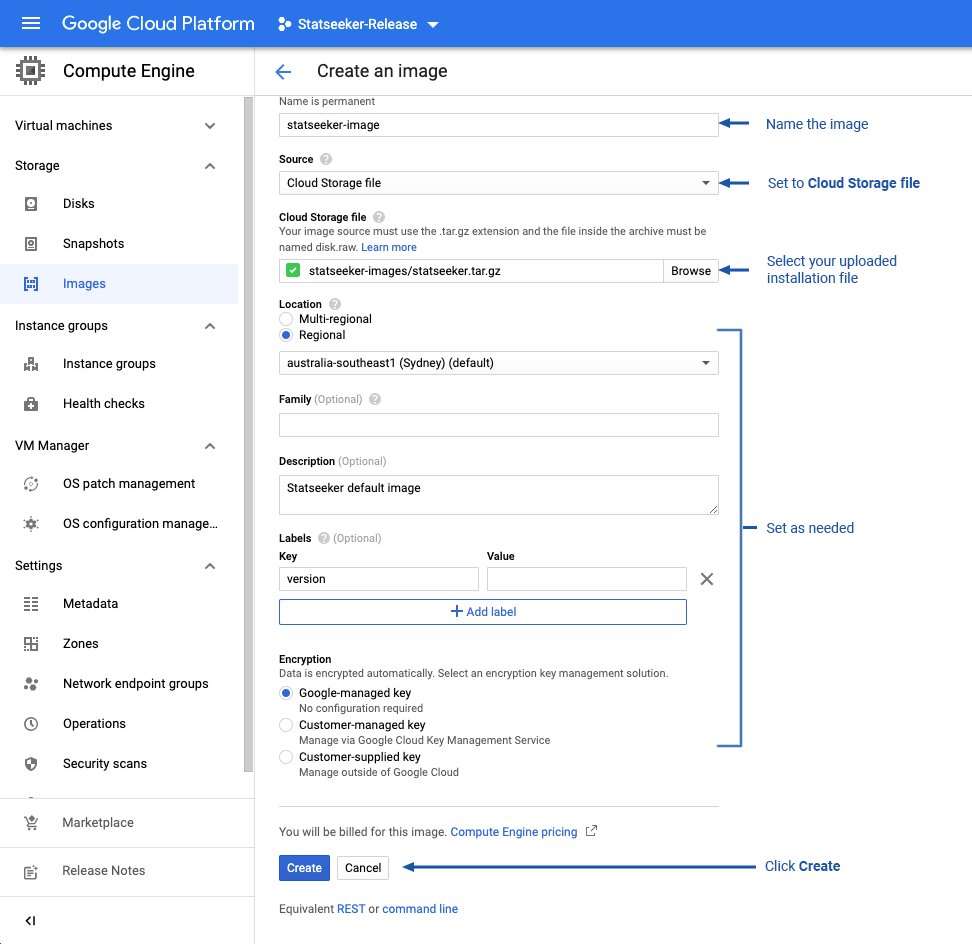
Create Image
We need to create a Google disk image from the uploaded installation file.
- Login to your Google Cloud Account and select your chosen Project
- From the main menu, select Compute Engine > Images
- Click Create Image
- Name the image
- Set Source = Cloud Storage file and select the Statseeker installation file that was previously added to your storage bucket
- Set Location, Family, Description, Tags and Encryption as needed for your organization
- Click Create
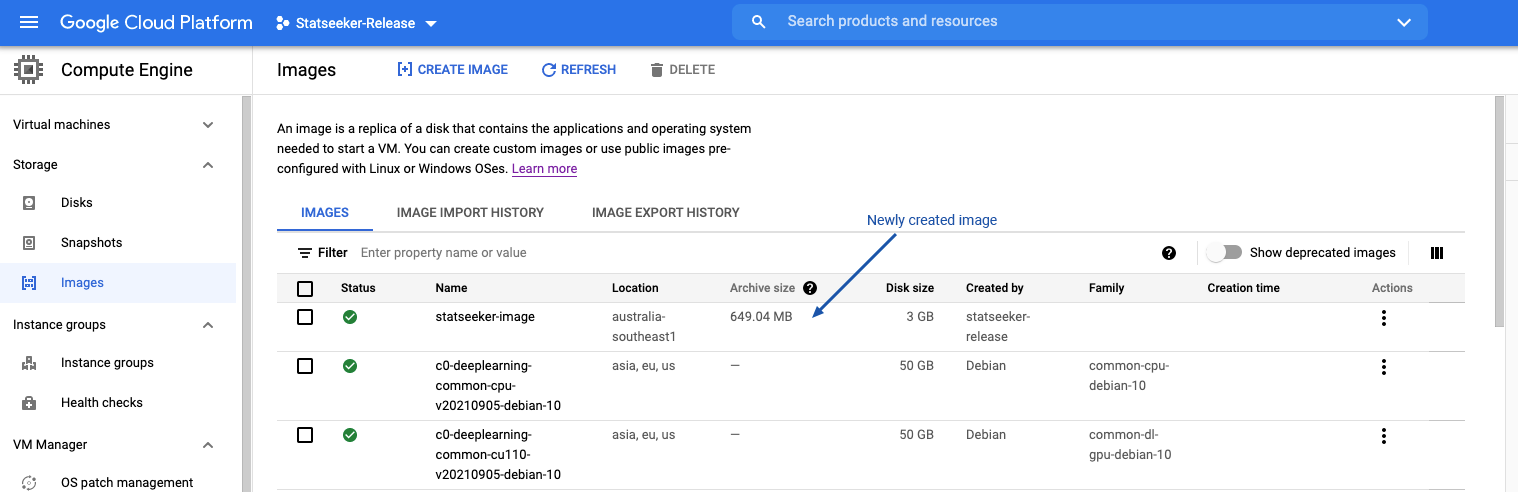
The image creation process may take a few minutes to complete your image listing will update with the new image once complete.
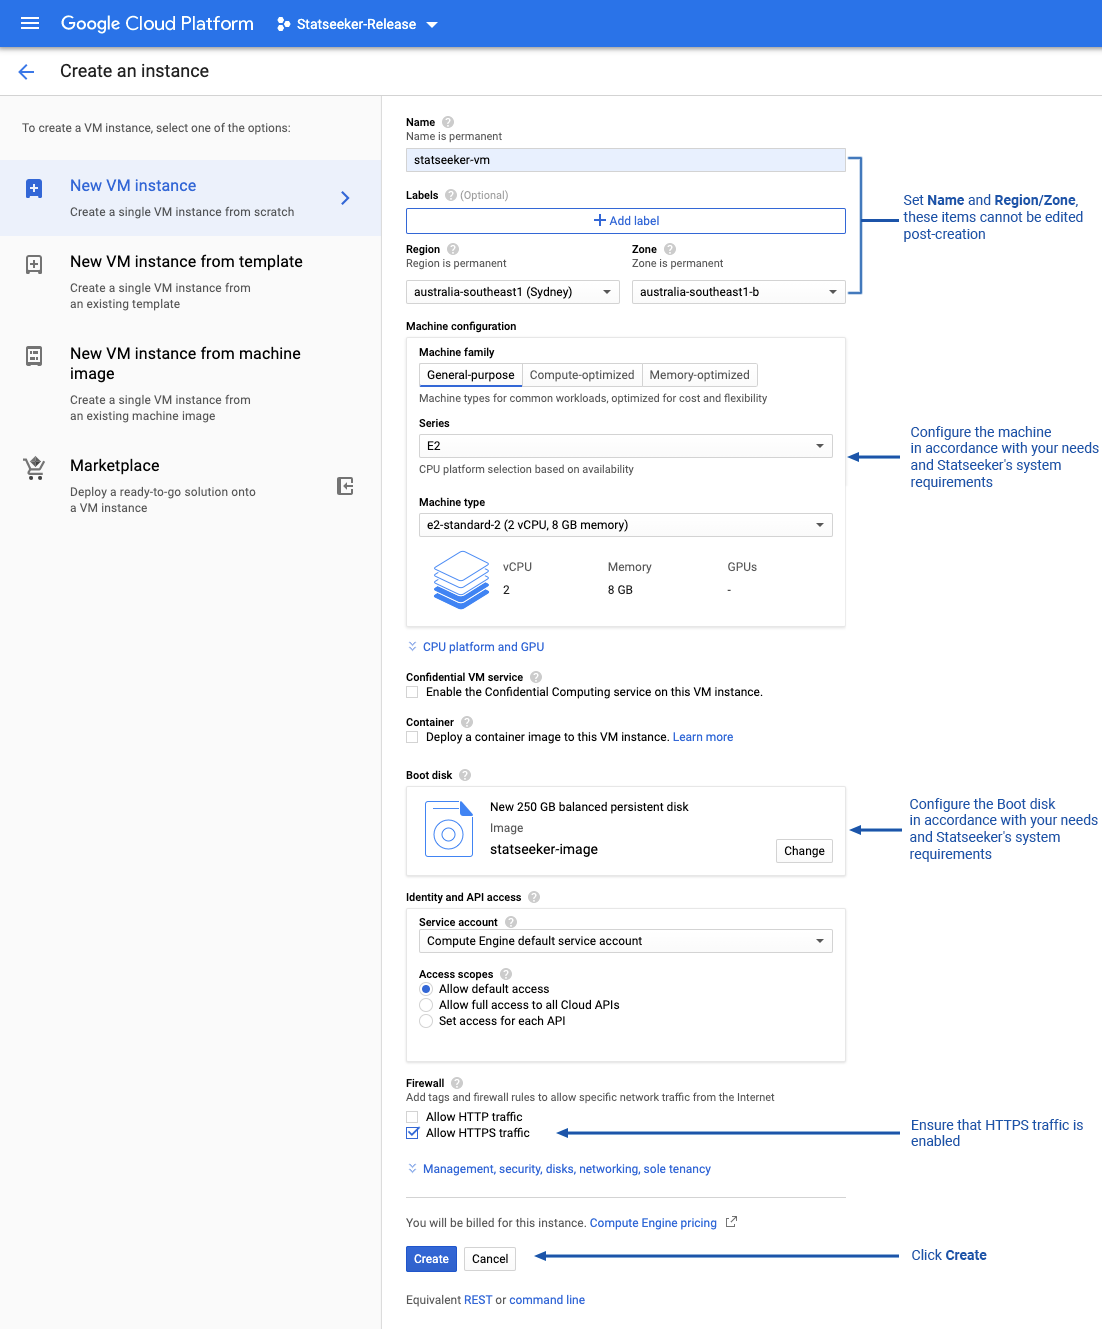
Create Statseeker Virtual Machine
- Login to your Google Cloud Account and select your chosen Project
- From the main menu, select Compute Engine > Images
- Locate your Statseeker image and select Actions > Create Instance
- Set the VM Name, hostname (see below), and Region\Zone – these items cannot be altered after the VM is created
- Select Advanced options > Networking
- Specify the custom Hostname
The hostname can be verified after VM creation by:
- Going to VM Instances and selecting your Statseeker instance to open Instance Details
- Review the Hostname section (this section is only visible if a custom hostname has been applied).
- Specify the Machine Configuration and Boot Disk to suit your needs according to the Statseeker System Requirements
- Set Firewall = Allow HTTPS traffic
- Click Create
The VM will be created, the list of VM instances will be updated with your new Statseeker VM, and the Statseeker installation process will begin.
- Select the new Statseeker VM instance to view the VM’s details
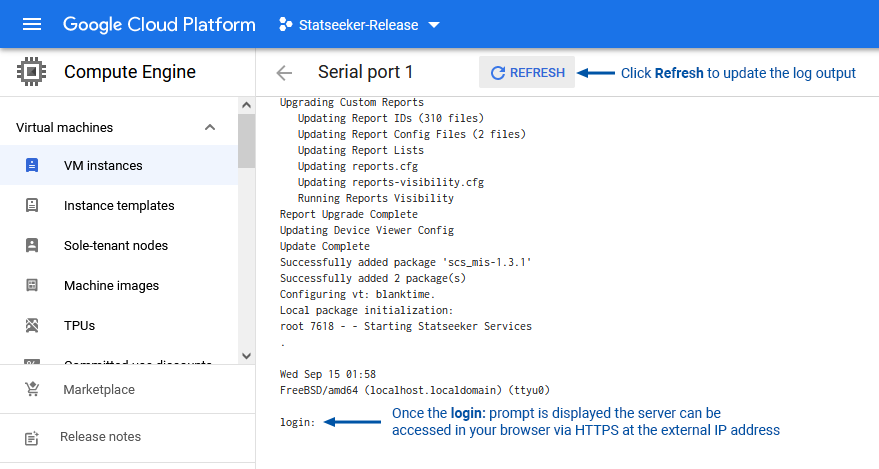
- Select Logs > Serial port 1 (console) to view the current state of the Statseeker installation process
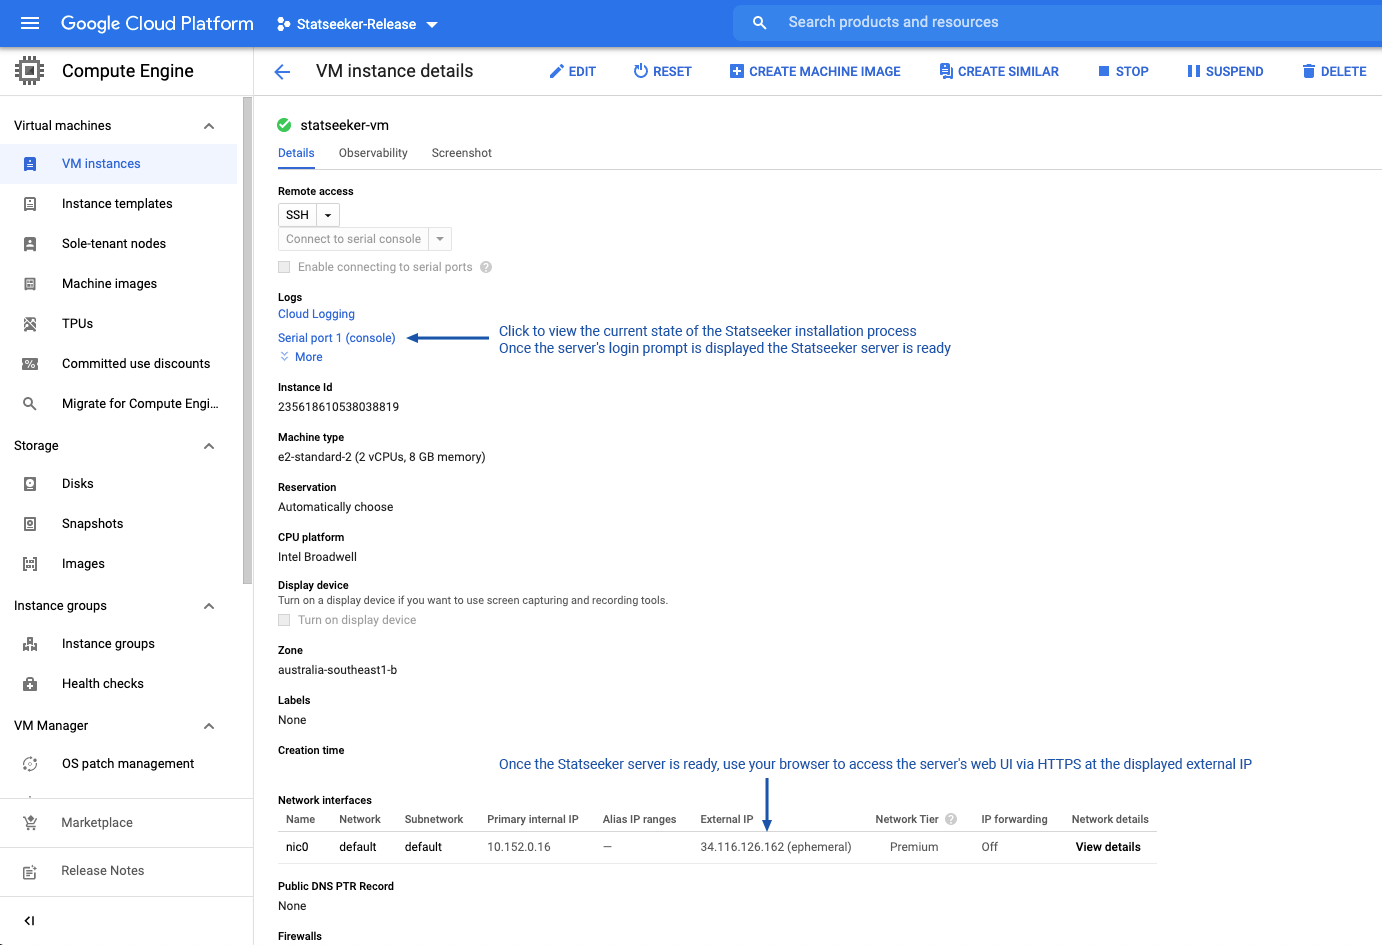
- Refresh the log output until the login prompt is displayed
- Access the Statseeker server’s web UI in your local browser via HTTPS at the VM’s external IP address
Server Licensing
By default, the Statseeker web server will use HTTPS in conjunction with a self-signed certificate. Modern browsers will view self-signed certificates as potentially suspect and post an alert prior to loading the Statseeker interface for the first time. To suppress any future alerts for that specific certificate:browser combination:
- Follow the browser prompts to acknowledge the risk and add an exception for the certificate
For details on how to upload and use alternative SSL certificates, or configure the server to use HTTP instead, see Web Server Configuration.
You will then be prompted with a login screen.
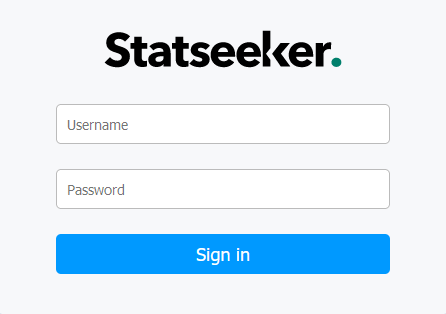
- User Name – admin
- Password – statseeker
Once logged in to the web interface you will be prompted with the Statseeker License configuration screen.
- Enter your Server ID and select Download a new Key
It may take a minute or two to obtain your license key.
- Select the checkbox to accept the Statseeker license
- Select Save to activate the license key
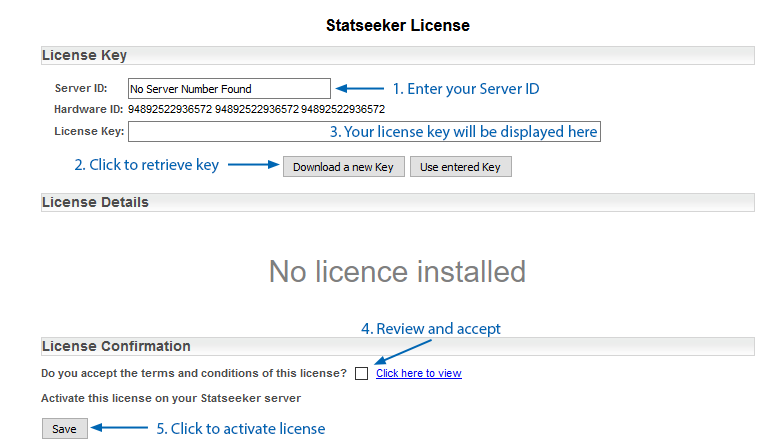
The screen will update to display the license details.
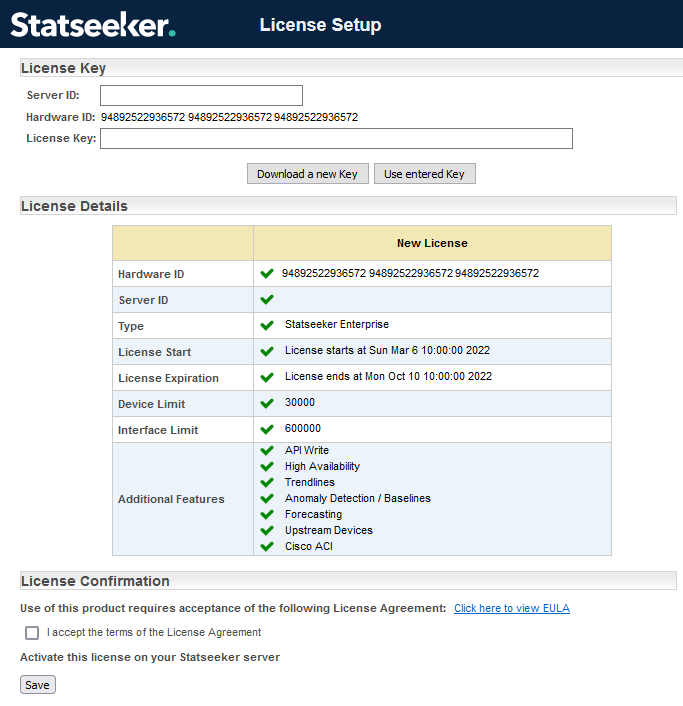
- Click Next
Multi-Disk Servers
If your Statseeker server has multiple disks you will be given the option to assign another disk as the repository for Statseeker data. This screen will only be displayed if Statseeker detects more than one disk.
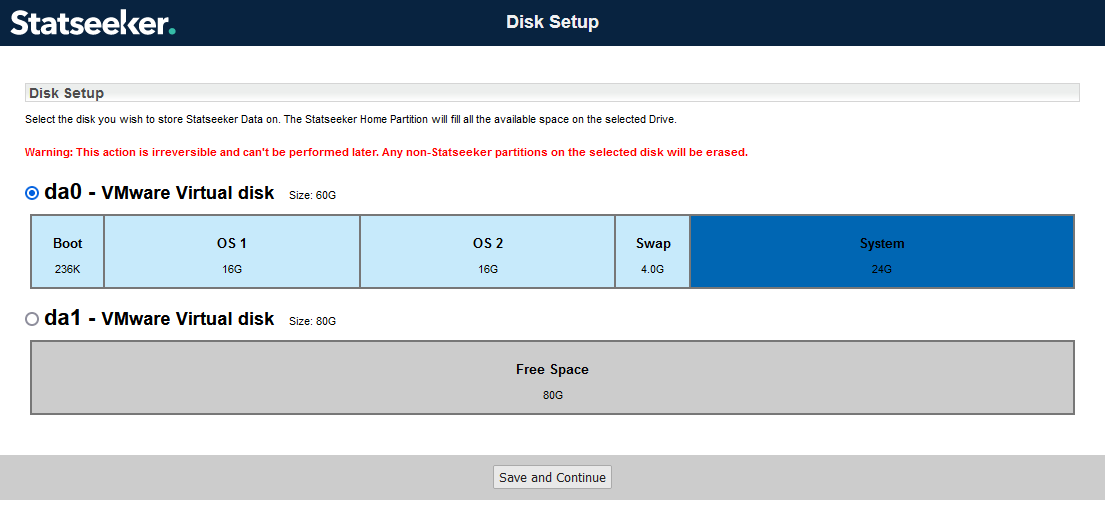
Prepare Secondary Disk for Statseeker Data
Optionally, you can store all Statseeker data on another disk on the server. Assigning a disk as the repository for Statseeker data will delete all current content on the disk.
To store Statseeker data on a second disk:
- Select the disk that will act as the Statseeker data repository – all existing data on this drive will be erased
- Click Save and Continue, then confirm the decision when prompted
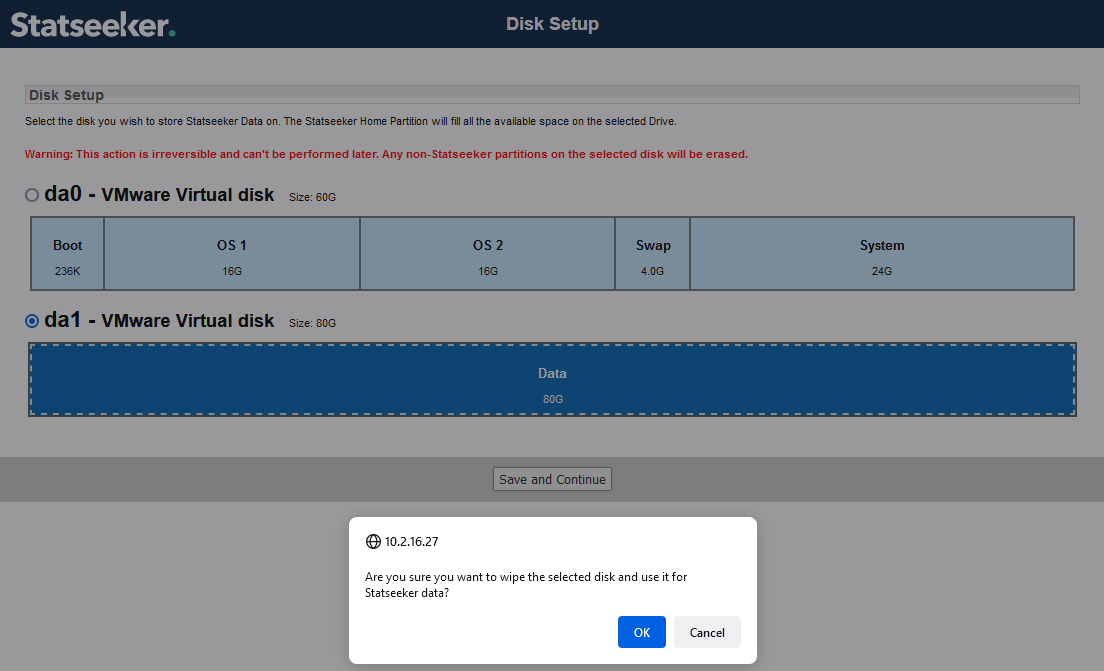
You may need to re-authenticate with the server once this process has been completed.
You will now be presented with the Server Summary screen, containing a range of details pertinent to your Statseeker installation.
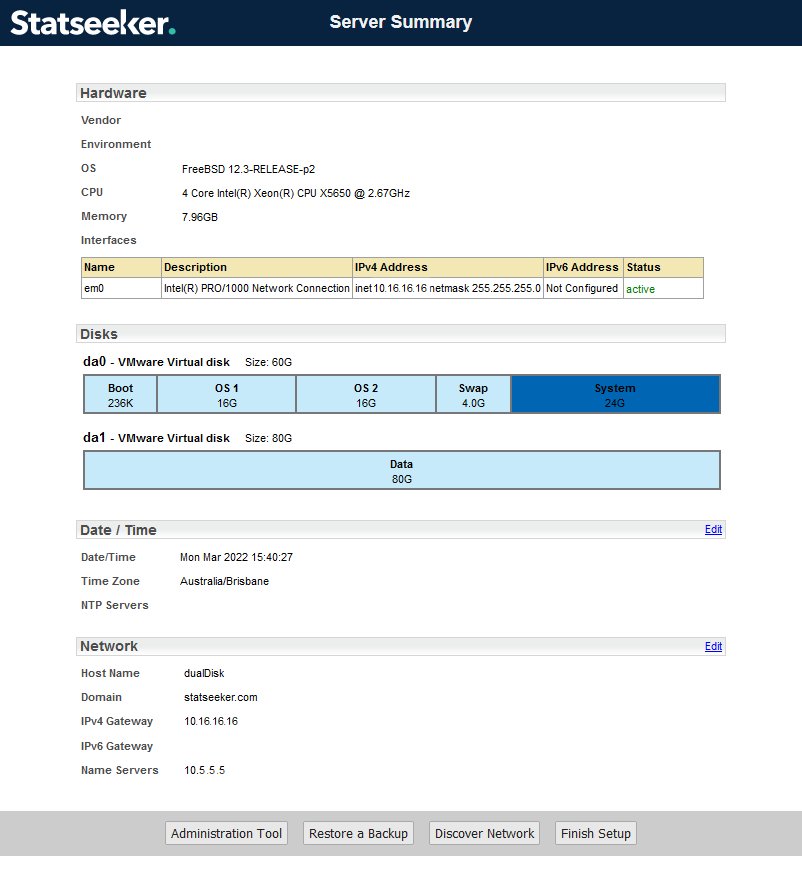
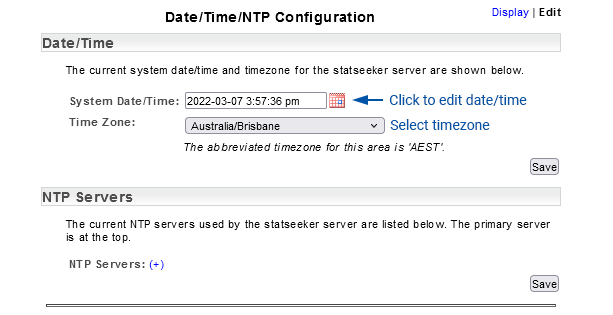
Edit Server Date/Time and NTP Configuration
To edit the server date/time settings:
- Click the associated Edit link on the Server Summary page
- Use the calendar control to edit the date and/or time
- Use the drop-down to modify the timezone for the server
- Click Save when done
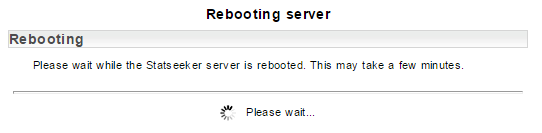
The configuration changes will be saved, and the server will be restarted to apply those changes.
Once the changes have been applied you will be returned to the Date/Time/NTP Configuration screen (in Display mode) to confirm that the changes have been applied correctly.
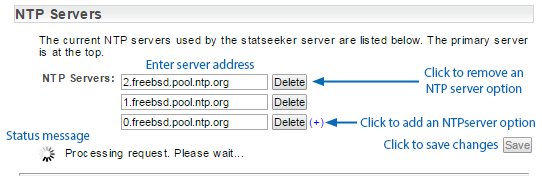
Edit NTP Configuration
To edit the NTP server settings:
- Click the associated Edit link on the Server Summary page
- Enter the address of the NTP server to use
- Click the associated Delete button to remove unwanted NTP server entries
- Click Save when done
When you click Save Statseeker will attempt to contact the specified NTP servers and:
- Inform you if it is unable to receive a response from the NTP server, no changes have been applied at this point
- If it receives a valid response from the NTP server, apply the changes and return the Date/Time/NTP Configuration screen (in Display mode), enabling a Test button that can be used to confirm the validity of the current configuration.
- Click Finish Setup
Update Default Passwords
The installation process creates the following administrative system accounts:
- admin – the web user administrator account
- statseeker – the system user account used by the Statseeker application
- root – the superuser account in the backend operating system
You will need to update the passwords assigned to these accounts. To do this:
- Select Admin Tool > Statseeker Administration > OS Configuration
- Click Edit (top-right)
- Update the passwords for the root, statseeker, and admin accounts
Run Network Discovery
Statseeker’s network discovery process is used to add networked devices, interfaces, and other SNMP enabled components on your network to Statseeker. Statseeker can then collect configuration information and timeseries data from those devices to be used for polling, reporting, and alerting purposes. There are several methods that can be used to direct the discovery process towards the devices on your network that you want Statseeker to report on:
- Discover Using Ranges (IPv4) – specify one or more IP address ranges and discover all devices responding to SNMP within that range
- Discover Using Hosts (IPv4/IPv6) – add entries to the hosts file, and run a Discover Using Hosts
- Add A Single Device (IPv4/IPv6) – use the Add Single Device option to individually add IPv4/6 devices
- Add SNMPv3 Devices (IPv4/IPv6) – single or batch addition of SNMPv3 devices
- Add Ping-Only Devices (IPv4/IPv6) – add an IPv4/6 device to be monitored via ping, but not SNMP
Determine the discovery method that best fits your needs and follow the instructions in the associated discovery guide, see Statseeker Network Discovery for details on the discovery process.
Apply Service Packs
Check for and apply any Service Packs applicable to your version of Statseeker. Contact Customer Support if you require any assistance.