** Legacy Dashboard System **
Statseeker v5.5.0 introduced a new dashboarding system. The legacy system was removed from new installations, but is still available to users upgrading an existing Statseeker server. This documentation is specific to that legacy system.
For documentation relating to the current dashboarding system see Statseeker Dashboards.
Index
- Overview
- User Accounts and Permissions
- Assign Dashboards to the User
- Setup the NOC Dashboard Display
Overview
The Statseeker Dashboard is the default view when accessing Statseeker via the web interface.
The dashboard is both user and group aware, meaning that you can restrict access to a dashboard as well as tailor a dashboard to a given user (or group of users). Dashboards and users have a many-to-many relationship in Statseeker, meaning that:
- A dashboard can be accessed by one or more users
- A user can access one or more dashboards
In this way, you can tailor any number of dashboards to offer:
- A high-level overview of the entire network
- A view covering all devices of a specific type or in a specific location
- A focused snapshot of a group of interfaces
- A view into your hardware inventory and licensing requirements
You can also configure Statseeker to rotate the dashboard view through all of the enabled dashboards for the current user. This is very useful for display on a network operations center (NOC) panel.
User Accounts and Permissions
When rotating dashboards, Statseeker will use every dashboard currently enabled for the user. For this reason, you may not want to use the default admin account, rather create a specific account for this purpose and associate only those dashboards that you want displayed on the NOC with that new user.
In order for the dashboards to display all the data, you will need to ensure that the user is assigned all the group permissions required to access all the devices that will be reported on, as well as all of the reports that will be displayed on the dashboards.
To create a new Statseeker user account:
- Select Administration Tool > User Profile/Grouping > Add / Edit Users
This will open the Add / Edit Users page with the Administration Tool.
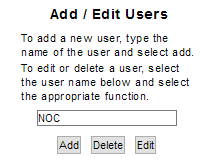
- Enter a username into the text field and click Add
The New User Configuration screen is displayed.
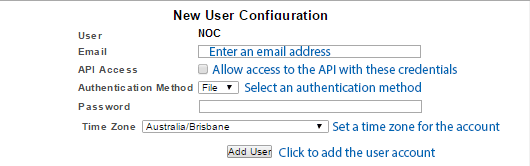
- Specify an email address for the account
- Optionally allow the same account credentials to provide access to the Statseeker RESTful API
- Specify an authentication method:
- File – authenticated directly with the Statseeker server
- LDAP – use your existing Active Directory/LDAP authentication to manage access to Statseeker
- RADIUS – use your existing RADIUS server to manage access to Statseeker
Note: the Authentication Method field is only visible if Statseeker has been configured to use either LDAP or RADIUS authentication, otherwise all accounts are considered to be using basic file authentication and the field is hidden. For more information see User Authentication. - If the account is configured to use File authentication, then the Password field will be displayed, enter a password for the account
- Set the required time zone for the account, this will be used when displaying reports to the user within Statseeker
- Click Add User
The user account has been saved, and can be used immediately.
For more details on creating user accounts, see User Accounts.
Grant Access to all Groups and Reports
To grant the NOC user account access to all reports, groups and devices we will create a group to house everything and then assign the NOC user access to that group:
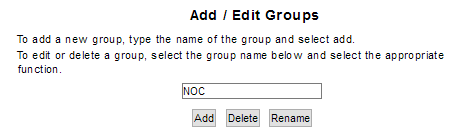
- Select Administration Tool > User Profile/Grouping > Add / Edit Groups
- Enter a name for the new group and click Add
Next, populate the group:
- Select Administration Tool > User Profile/Grouping > Entities to a Group
- Select your new group
- In the right-hand panel, set Entity Type to Report
- Click All >> to move all reports from the exclude list to the include list
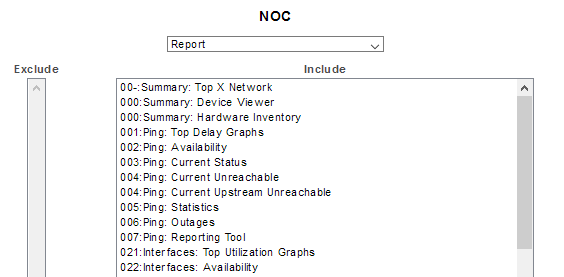
The group now contains all current reports.
- Select Administration Tool > User Profile/Grouping > Groups to an Entity
- Set the entity type to User, and select the NOC user
- Select All Groups and click the >> button to move the selection to the include list

The NOC user now has access to all currently monitored devices and all reports.
For more details on associating devices, groups and reports with user accounts, see Grouping Devices, Interfaces, Users and Reports.
Copy Dashboards to the NOC User
If you have already created dashboards, then you can log into Statseeker as an Admin user, and assign those dashboards to the NOC user account by following the process presented below.
Any new dashboards created while logged in as the NOC user are automatically available to that user.
- Go to Administration Tool > Reporting / Scheduling > Dashboards
- Select the Dashboard Copy Utility
- Select the dashboards to be copied, multiple selections can be used using the shift and ctrl keys while making the selection
- Select the NOC user and click Copy
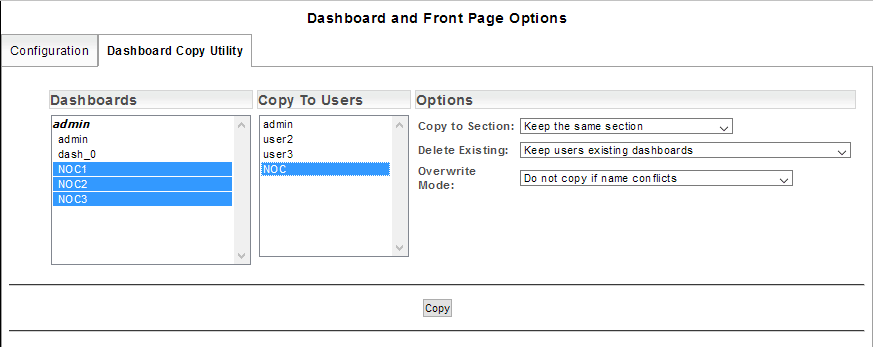
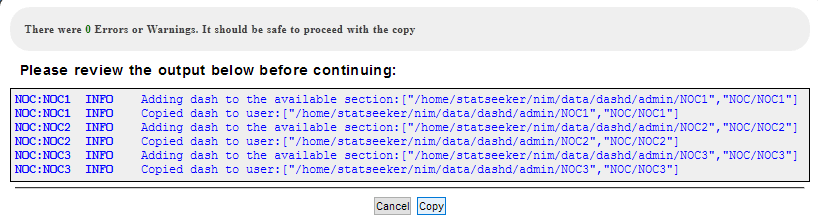
The copy process is simulated and a summary of the results is displayed.
- An error will be displayed if a user does not have access to a report or group featured in the dashboard
- A warning will be displayed if a user does not have access to a report or group referenced in a drill-down from a report featured in the dashboard
- Review the summary, address any warnings/errors and click Copy to confirm the action
Setup the NOC Dashboard Display
- Access the Statseeker web interface on a system linked to the NOC screen as the NOC user
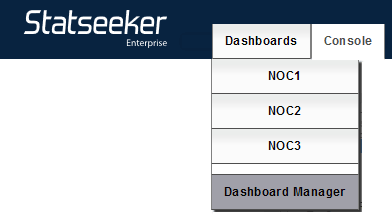
- Select Dashboards > Dashboard Manager
- Set the Rotation Delay Time
- Set Hide Headings to minimize the Statseeker web interface title bar
- click Start Dashboard Rotation, and set the browser to fullscreen display

The first NOC dashboard will be displayed and the iterate through the dashboard list, rotating according to the Rotation Delay Time

Edits can be made to the dashboard list, or the contents of a dashboard and pushed down to the NOC user as needed.