
Index
- Overview
- Save Report as PDF
- Emailing a Report
- Preview the Email Contents
- Editing Email Reports
- Send Multiple Reports in a Single Email
- Scheduling Reports
- Editing Existing Schedules
- Disabling and Deleting Schedules
Overview
You can email any report that you are currently viewing, and where you find the requirement for regular reporting, you can establish a schedule to have a pre-configured report run and emailed automatically. In this way, targeted data from Statseeker can be provided to anyone within your organization, not just Statseeker users.
While emailing capabilities are built into your Statseeker deployment, they must be configured prior to use. For details on configuring Statseeker to work with your email server, and testing this configuration, see Email Configuration.
Save Report as PDF
All reports can be saved to PDF:
- Run the report
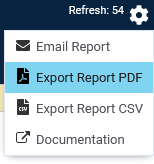
- Mouse-over the report options ‘gear-wheel’ icon
- Select Export Report PDF
- Specify the Page size, Orientation and Top N and click Export
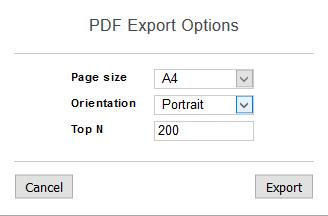
- Specify the save location and click OK
Emailing a Report
When emailing a report, the report is converted to a *.pdf and attached to your email. To email report:
- Run the report
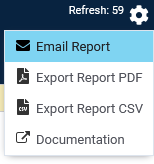
- Mouse-over the report options ‘gear-wheel’ icon
- Select Email this Report
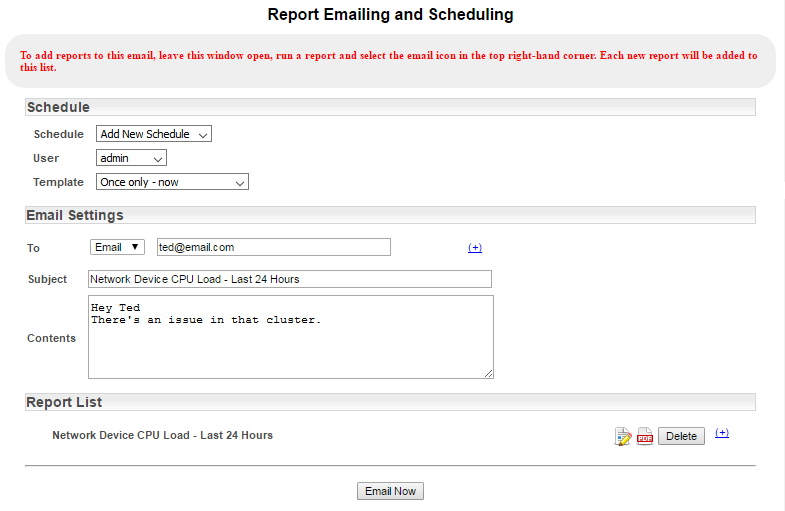
This will open the Report Emailing and Scheduling window and add the report to the list of attachments.
- To simply email the report, ignore the Scheduling section at the top
- Address the email by selecting:
- Email – specify and email address
- User – specify a Statseeker user and have the email sent to their associated email address
- Group – select a Statseeker group to have the email sent to all users contained within the group
- Click the (+) icon to add additional recipients as required
- Set the email Subject line
- Include Contents to be displayed in the email body as required
The report has been converted to a .pdf and will be attached to the email when sent.
- Click Email Now to send the email
Preview the Email Contents
The Report List section contains details of all reports that will be attached to the email when sent. You can preview the converted report prior to sending by clicking the csv or pdf icon associated with the report. If the content or layout of the attached report require adjustment prior to sending then this can be achieved from within the Report Emailing and Scheduling form, see Editing Email Reports.
Editing Email Reports
In some instances, you may wish to modify the report prior to sending. Statseeker allows you to edit the report layout, configuration, and format. The edit a report being sent via email:
- Select the edit attachment button for the attached report

This expands the Report List section to present the options available for editing the attachment.
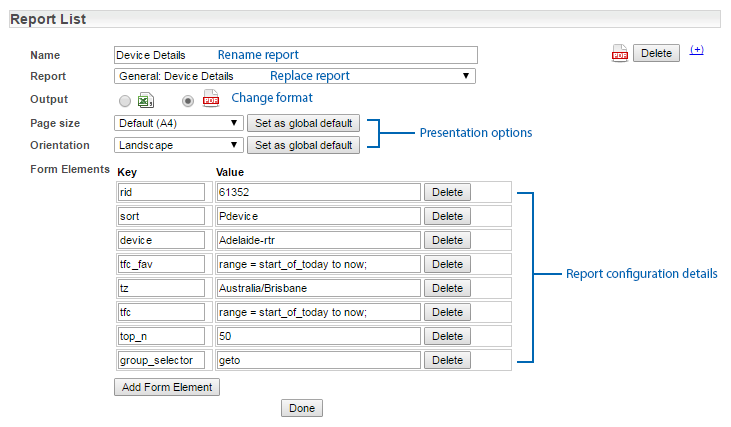
- Edit the report as required and click Done
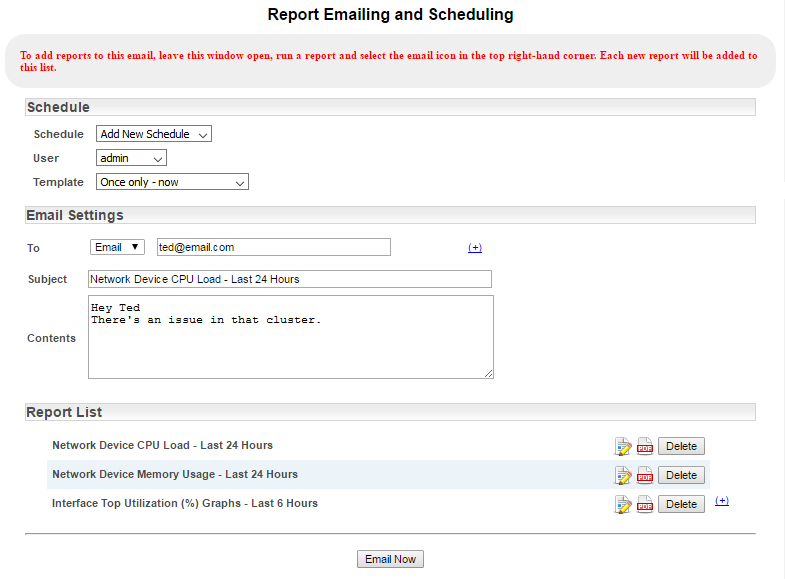
Send Multiple Reports in a Single Email
To add multiple reports:
- Run a report
- Mouse-over the report options ‘gear-wheel’ icon
- Select Email this Report
- Leave the Report Emailing and Scheduling window open and return to the Console
- Run additional reports, repeating the Email this Report action for each
- Set the email recipients, clicking the (+) icon to add additional recipients as required
- Set the email Subject line
- Include Contents to be displayed in the email body as required
- Click Email Now to send the email
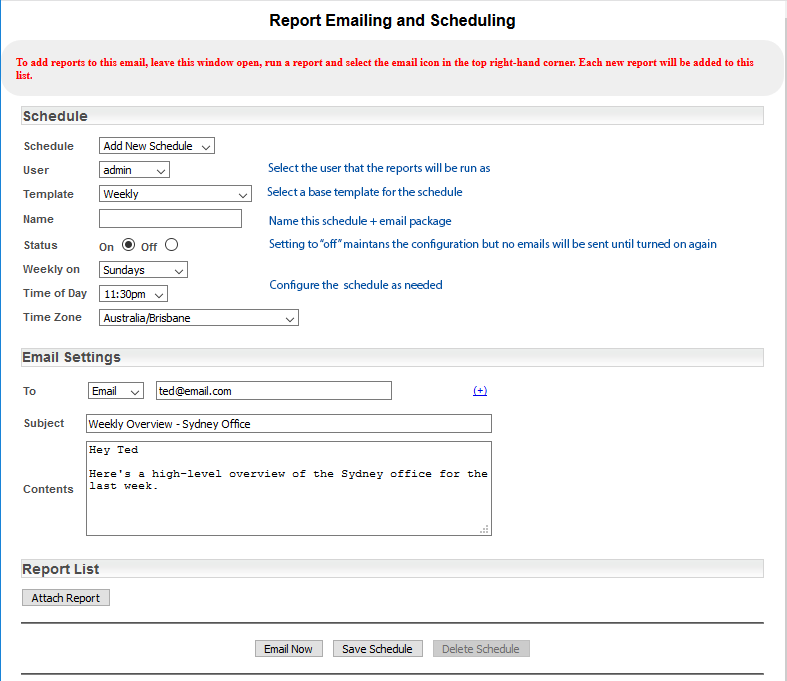
Scheduling Reports
You can configure Statseeker to automatically run and email reports on a once-off or re-occurring schedule. You can access this functionality from within the report:
- Mouse-over the report options ‘gear-wheel’ icon and select Email this Report
- Set the Statseeker user that the reports will be run as
- From the Schedule section use the Choose Template drop-down to select a base template, see the table below for details on the stock templates
| Template | Description |
| Daily | Send an email every day at the specified time |
| On Business Days | Specify a range of days on which the email should be sent e.g. Monday to Friday |
| Weekly on | Specify a day of the week on which to send the email |
| Fortnightly / Biweekly | Specify a day per fortnight (2-week period) on which to send the email |
| Monthly by Day | Specify a day of the month e.g. 3rd |
| Monthly by Week and Day | Specify a week, and day of the week within each month e.g. First Monday of the month |
| Quarterly / Half-Yearly / Yearly | Specify a month and day of the month, the quarterly / half-yearly periods are then calculated by month |
| Custom | Manual configuration of all possible scheduling options |
- Modify the template as required
- Specify a Name for the new schedule + email package
- Set the Status of the schedule
- On – the configuration is saved and applied, emails will be sent as per the schedule
- Off – the configuration is saved but not used, no emails will be sent
- Set the email recipients, clicking the (+) icon to add additional recipients as required
- Set the email Subject line
- Include Contents to be displayed in the email body as required
Reports can be added to the email schedule by:
- Running a report
- Mouse-over the report options ‘gear-wheel’ icon
- Select Email this Report
- Leave the Report Emailing and Scheduling window open and return to the Console
- Run additional reports, repeating the Email this Report action for each
- Click Save Schedule
The schedule is now saved and Statseeker will create and send email reports according to this schedule.
Editing Schedules
Editing the Schedule Configuration
All elements of the scheduled email configuration, with the exception of adding additional reports to the schedule, can be edited from Administration:
- Select Administration > Reporting / Scheduling > Email Scheduler
- Select the email schedule to be edited from the Schedule drop-down list
- Edit the configuration as needed and click Save Schedule
Adding a Report to an Existing Schedule
To add a report to an existing schedule:
- Run the report to be added
- Mouse-over the report options ‘gear-wheel’ icon
- Select Email this Report
The schedule configuration window will be displayed.
- Select the schedule you want to add the report to from the drop-down
- Go back to the report window and again select Email this Report
The schedule config will be updated, adding the new report.
- Repeat to add additional reports and Save when done
Disabling and Deleting Schedules
Existing scheduled emails can be disabled from Administration.
Disable a Schedule
To disable the schedule but retain the configuration for later use:
- Select the email schedule to be disabled from the Schedule drop-down list
- Set Status to off
- Click Save Schedule
Delete a Schedule
To delete the schedule:
- Select the email schedule to be deleted from the Schedule drop-down list
- Click Delete Schedule