
Index
- Overview
- Manual Group Creation, Renaming and Deletion
- Manually Populating Groups
- Managing Users, and their Access with Grouping
- Grouping for SLA Reporting
Overview
Grouping is a fundamental feature in the Statseeker product, it is a core mechanic utilized by:
- Reporting
- Thresholds
- Alerting
- Visibility and access control
- Filtering response data when utilizing the API
While Automated Grouping is designed to handle the majority of your grouping requirements, manual grouping offers a very limited set of functionality that auto-grouping doesn't. Manual grouping is required for:
- Managing Statseeker user account's access and visibility to devices and reports
- Grouping non-infrastructure elements such as reports, users, and SLA configurations
Manual Group Creation, Renaming and Deletion
In addition to those groups created by the Automatic Grouping process you can manually create and populate groups to suit your needs.
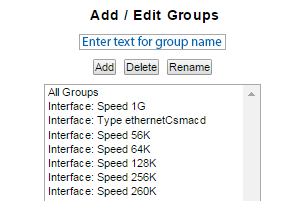
- Select Administration Tool > User Profile/Grouping > Add / Edit Groups
- Enter a group name in the text field and click Add
- Click to select the group from the list of existing groups
- Enter the new group name into the text field and click Rename
- Click to select the group from the list of existing groups
- Click Delete
To add a group:
To rename a group:
To delete an existing group:
Manually Populating Groups
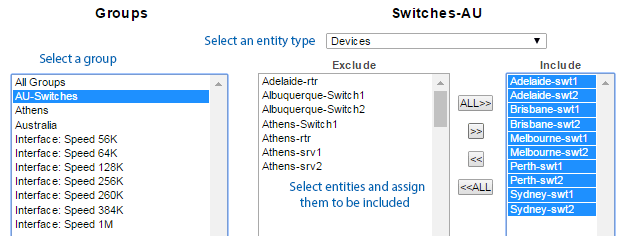
All groups can have their contents edited manually from the Administration Tool. This can be achieved in two ways, adding entities (device, interface, report, user, etc.) to a group or selecting an entity, and selecting which groups will contain that entity.
Adding entities to a group:
- Select Administration Tool > User Profile/Grouping > Entities to a Group
- Select a group
- Nominate an entity type (device, interface, report, user, etc.)
- Assign entities of that type to be included/excluded
- Repeat the process with different entity types if required
Groups contents are automatically updated.
Assigning groups to contain an entity:
- Select Administration Tool > User Profile/Grouping > Groups to an Entity
- Select an entity type
- Select an entity
- Assign groups to include/exclude the entity
- Repeat the process with different entity types if required
Groups contents are automatically updated.

Managing Users, and their Access with Grouping
By default, a new Statseeker user account has no visibility of your network via Statseeker. To allow the user to use Statseeker, and view data collected from your network, you need to associate the user account with one or more groups. A group may be a subset of all devices on your network, or a group of other users or reports.
Reports can be built to be targeted at a specific device or group of devices or they can be configured to be network-wide reports. If a Statseeker user only has visibility to a subset of your network, viewing a network-wide report will instead show the report as if it was configured to target the subnet that they have responsibility for.
For example, our new user, Minerva, logs into the Statseeker server but has no visibility of any device or associated report.
Minerva's user account needs to be associated with both devices and reports. We already have a group, London Hardware, which contains the devices in the location that Minerva will be administering, but we need to also give Minerva access to reports. We could simply add reports to the London Hardware group and give Minerva access to that group, but instead we are going to create a new group specifically for reports and all new network engineer accounts can be assigned that group when they come onboard.
We:
- Select Administration Tool > User Profile/Grouping > Add / Edit Groups
- Enter the group name Engineer Reports in the text field and click Add
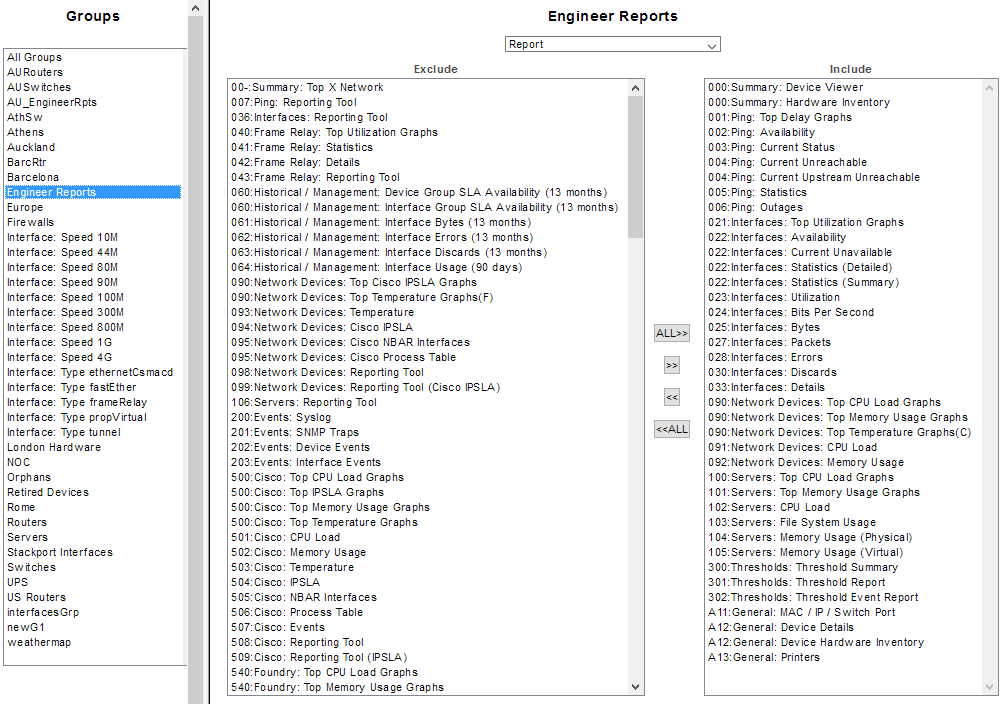
- Select Administration Tool > User Profile/Grouping > Entities to a Group
- Select the Engineer Reports group
- Nominate an entity type of report
- Assign a selection of reports to the group
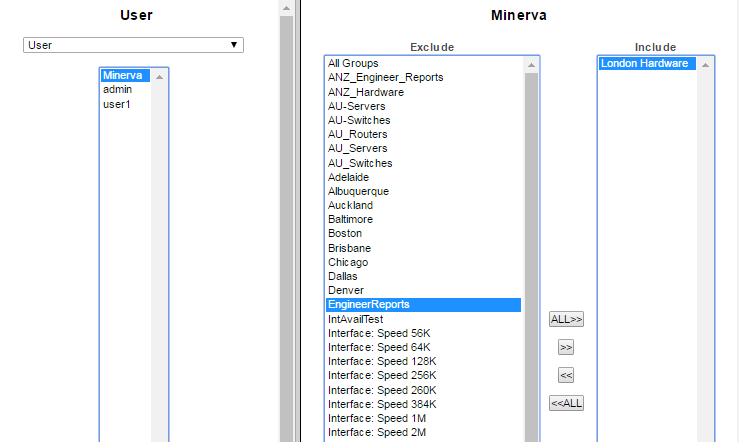
- Select Administration Tool > User Profile/Grouping > Groups to an Entity
- Select an entity type of Users
- Select Minerva from the list of users
- Select both the London Hardware and Engineer Reports groups from the list and click >> to add the group to the include column
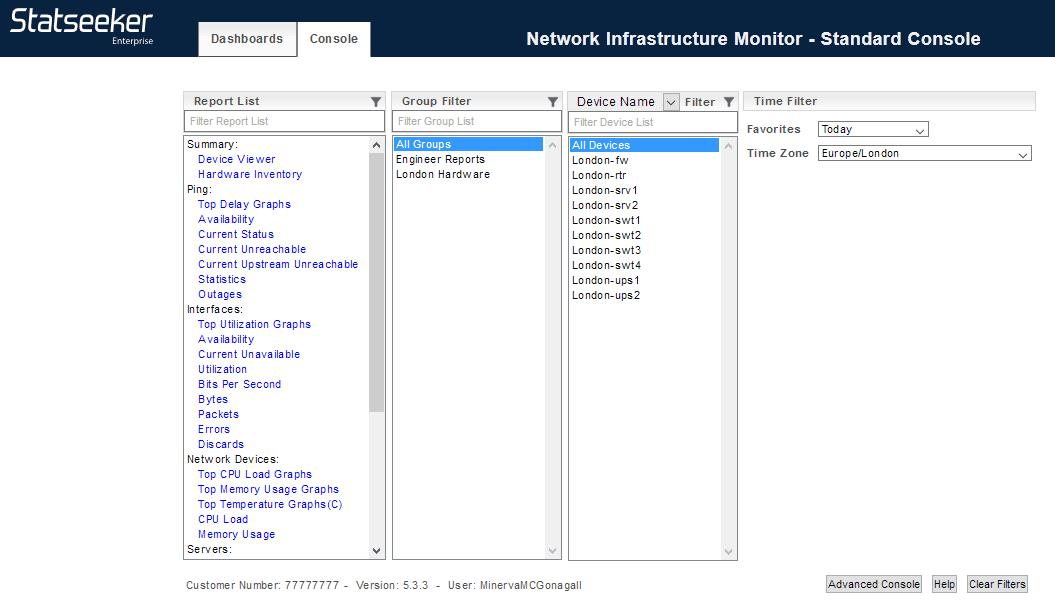
Minerva refreshes her browser and can now see the devices and reports contained within the two groups that her user account has been associated with.
Grouping for SLA Reporting
Manual grouping is also a required component for SLA reporting. This topic is covered in detail in its own document, see Service Level Agreement (SLA) Reporting for details.