Index
Overview
Statseeker is available for cloud-based deployment via Amazon’s AWS Cloud Services platform. This document provides an overview of the process required and highlights the key considerations when creating an AWS Statseeker deployment.
Requirements
Licensing
The final stages in deploying your AWS Statseeker instance will require licensing the Statseeker product. To obtain a Statseeker License, contact Statseeker Sales & Support.
System Requirements
The AWS instance configuration offers a range of EC2 Instance Types. Use these system requirements as a guide when specifying the EC2 Instance Type for your deployment.
| MonitoredNetwork | ServerRequirements | ||||
| Size | Max. Interface Count (*1) | CPU Cores | Memory (*2) | Storage | |
| Small | 50,000 | 4-8 | 16GB | 200GB | |
| Medium | 100,000 | 4-8 | 32GB | 500GB | |
| Large | 250,000 | 8-16 | 32GB-64GB | 1TB (*3) | |
| X-Large | 500,000 | 16-32 | 64GB-128GB | 1TB-2TB (*3) | |
|
Note:
|
|||||
Meraki Network Monitoring
If your Statseeker server will also be monitoring Meraki environments, then the following should be considered in addition to the requirements presented above.
- RAM – an additional 2GB will be consumed by Meraki monitoring processes (the size/number of Meraki environments monitored does affect this)
- Data Storage – assume a maximum of 3GB of storage per year per 1000 Meraki interfaces polled
- CPU – Meraki monitoring is not CPU intensive, no additional requirements
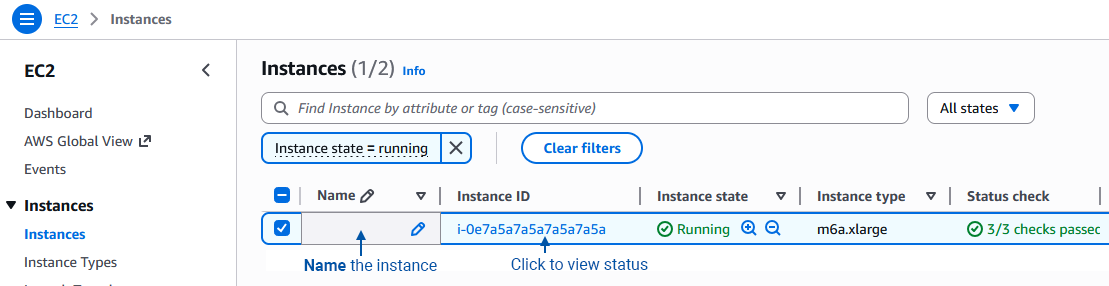
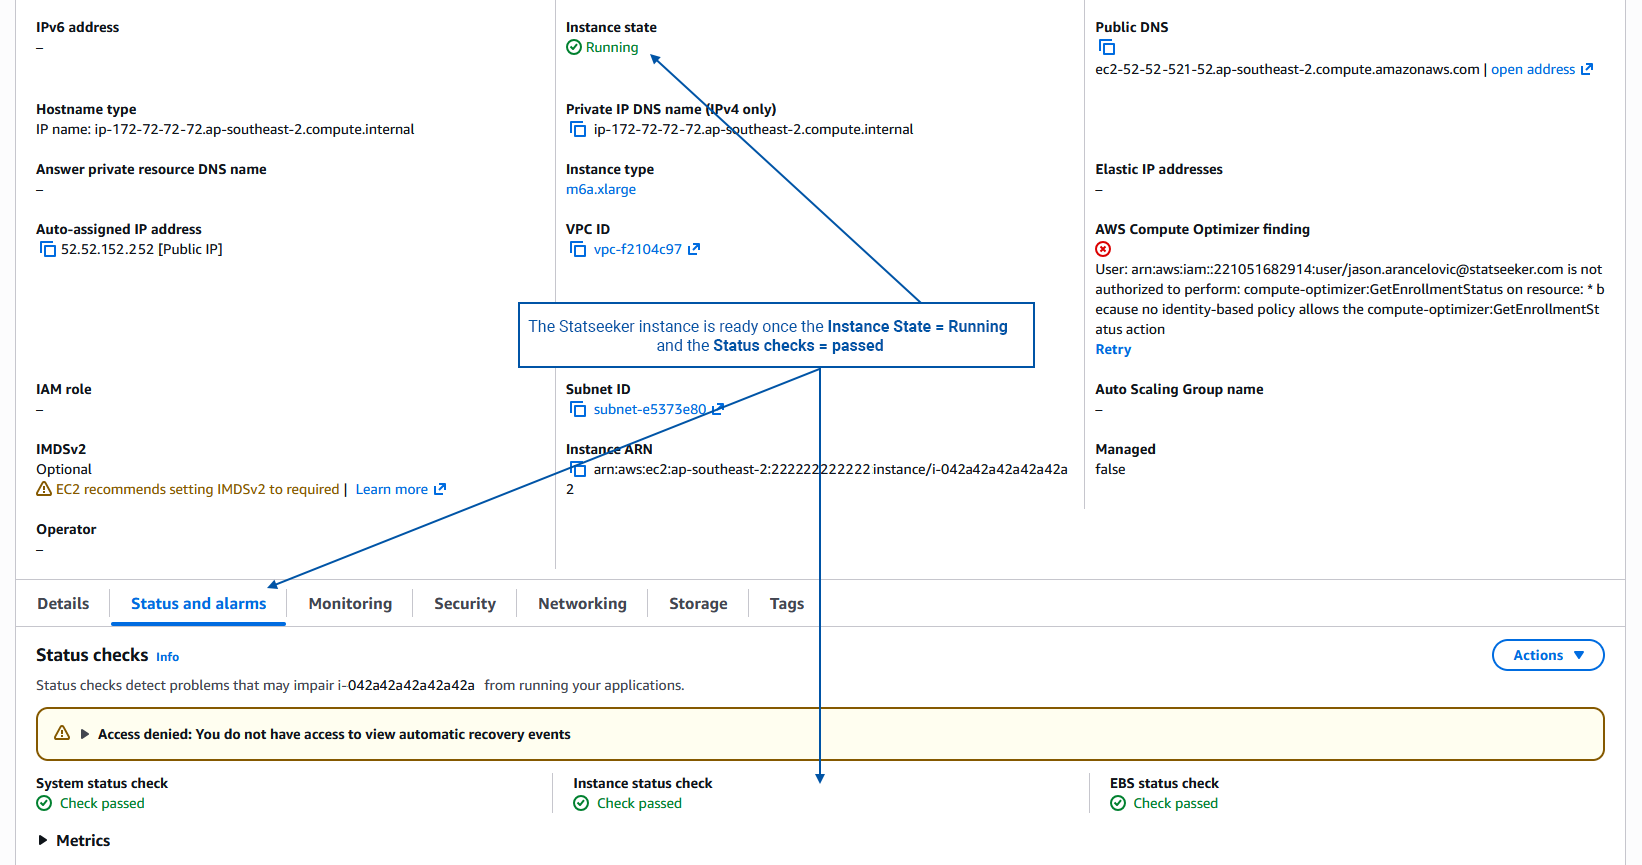
Initializing Your AWS Statseeker Instance
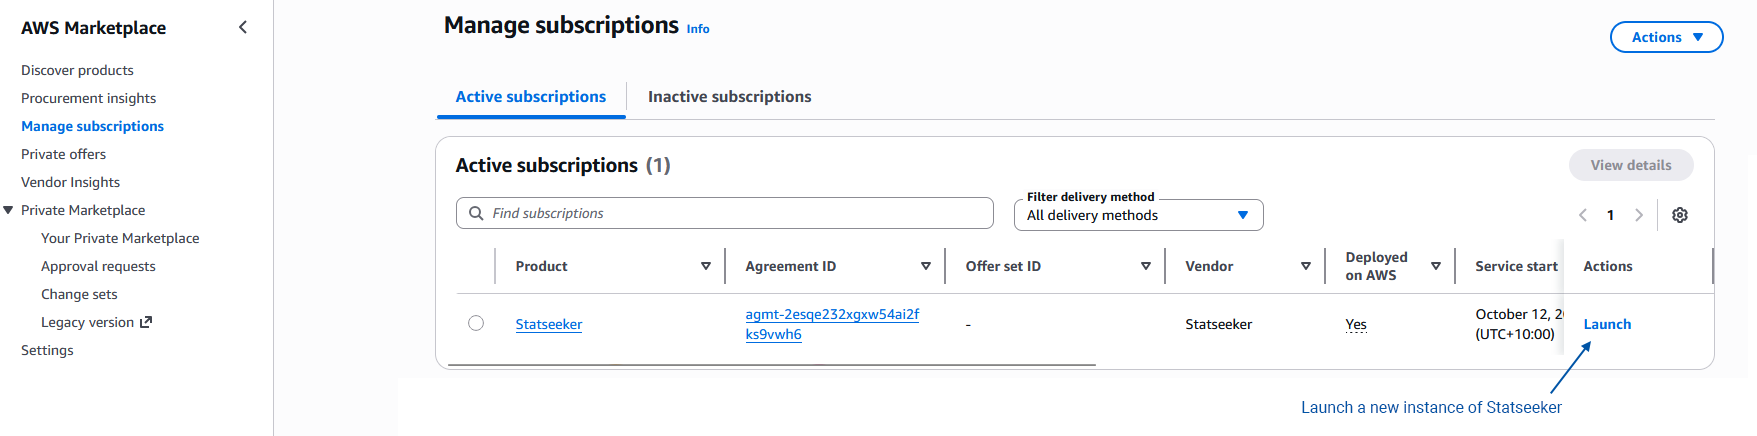
- Log into your Amazon AWS account and access the marketplace
- Search for Statseeker, and purchase an AWS Statseeker subscription

Once the subscription is complete, you will be able to launch a Statseeker instance. This option is also available from your AWS account Manage Subscriptions page.
- Select the Launch method, Version and Region
- Select the Instance type to suit your requirements, ensuring that the selected instance meets all minimum requirements for the relevant network size as detailed in Statseeker System Requirements
- Set the VPC and Subnet as needed to ensure that Statseeker will be able to monitor your network
- Set the Security Group and Key pair to suit your environment
Note: the Security Group must allow for the minimum protocol and port requirements for Statseeker to communicate with your network. If you intend to customize the Security Group, click Create security group and take note of the default settings. Ensure that any custom Security Group maintains these minimum requirements.