
Index
Overview
Statseeker is available for a cloud-based deployment via Amazon’s AWS Cloud Services platform. This document provides an overview to the process required to, and highlights the key considerations for, creating an AWS Statseeker deployment.
The Statseeker-specific requirements and considerations presented here will always be accurate.
Initializing Your AWS Statseeker Instance
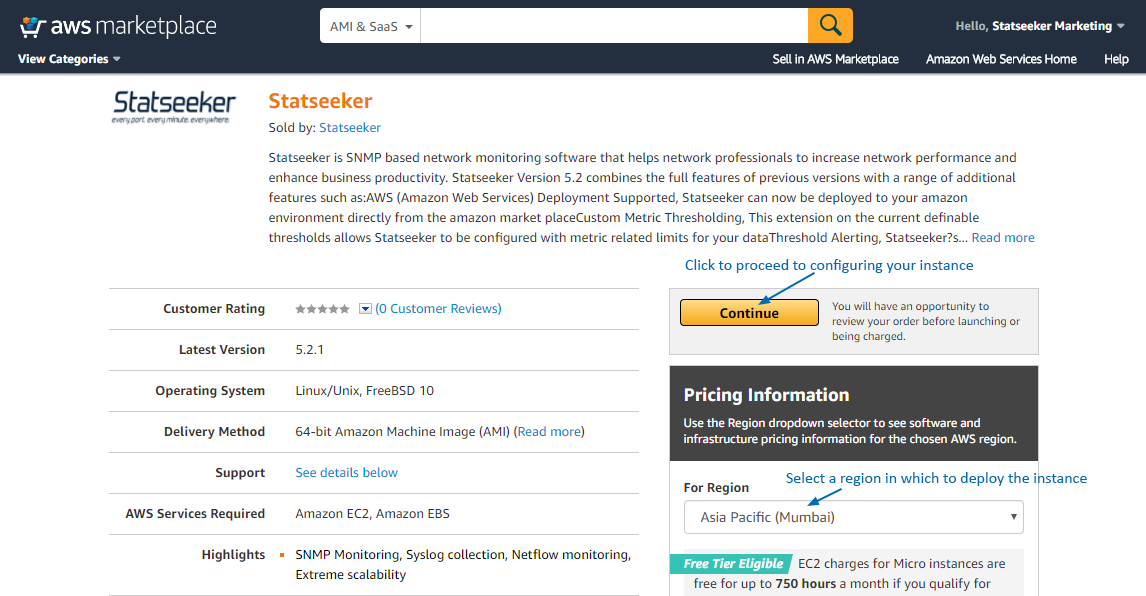
- Log into your Amazon AWS account and access the marketplace
- Search for Statseeker, and select Statseeker from the returned search results

- Set the deployment region as needed and click Continue
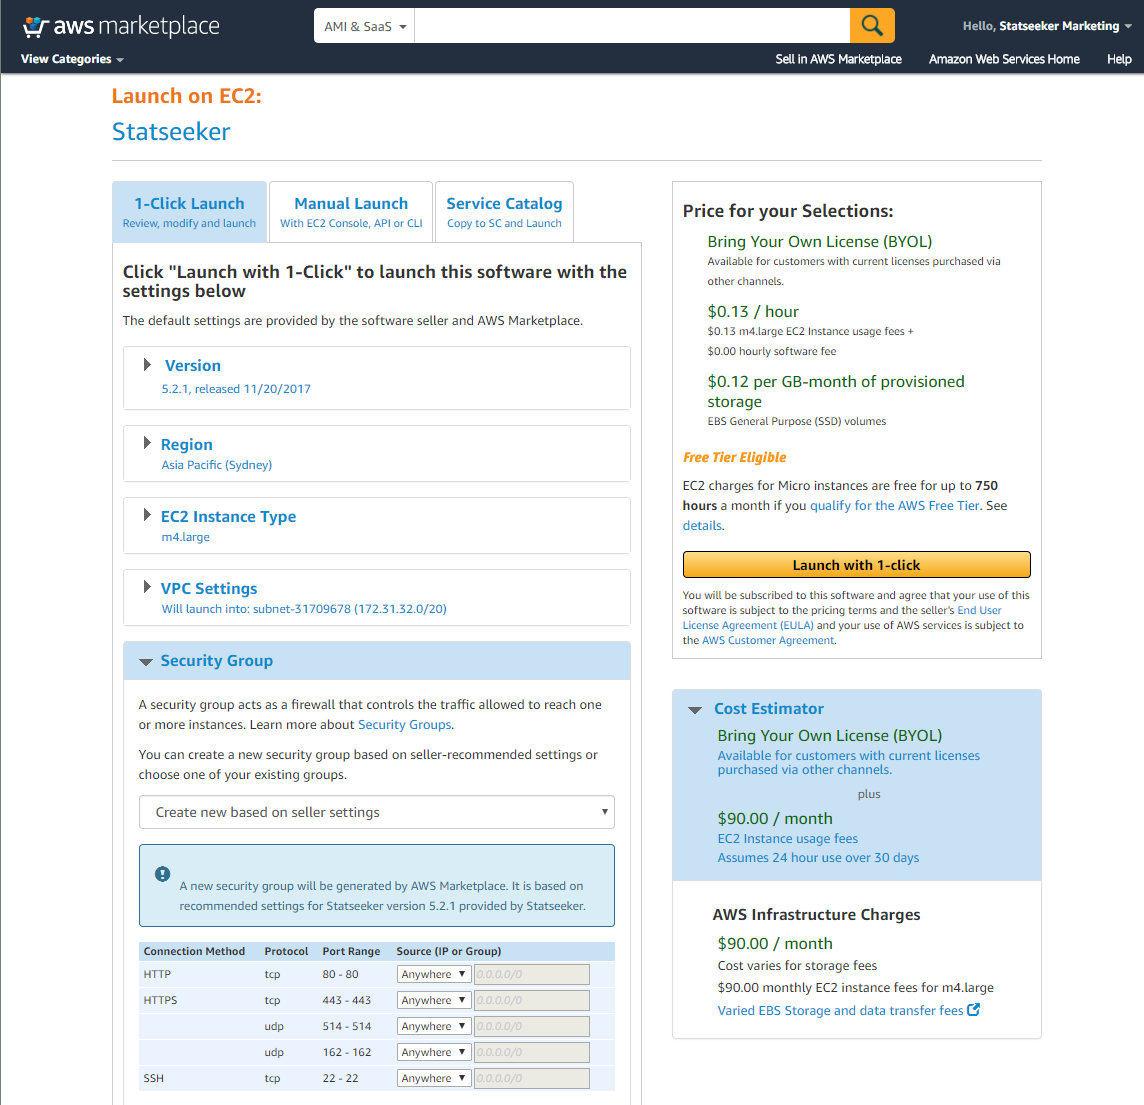
This will progress you to the next stage of the deployment, configuring your Statseeker instance.
- Adjust the Region settings as needed
- Select the EC2 Instance Type that best suits your needs, ensuring that the selected instance meets all minimum requirements for the relevant network size as detailed in Statseeker Hardware Requirements
- Optionally, adjust the VPC Settings to suit your deployment restrictions/requirements
- Under Security Group settings, select Create new based on seller settings to be presented with details on the minimum protocol and port requirements for Statseeker to communicate with your network. If you intend to customize the Security Group, be sure to maintain these minimum requirements.
- Select Launch with 1-click
You will be presented with a summary of your deployment and links to your EC2 console in order to monitor the deployment process.
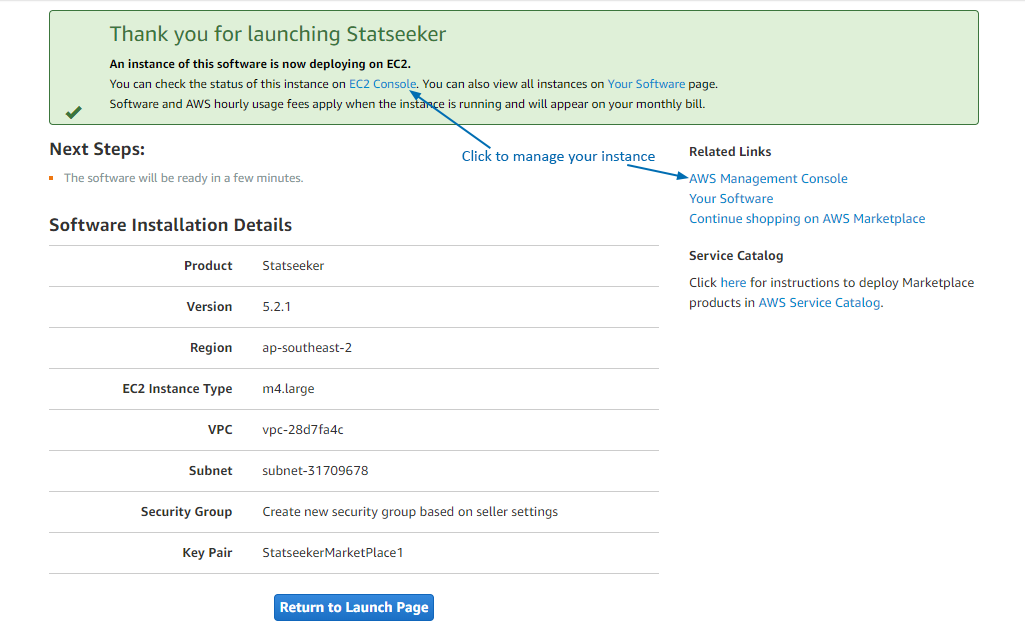
AWS will initiate the instance and you can review the status of the your new Statseeker server from the Instances screen.

Your Statseeker server will take a few minutes to run through some post-installation checks and startup a range of services. Once your Instance Status is reported as running and the Status Checks are complete you will be able to interact with your Statseeker server.
- Open a browser and go to the IP address that you specified for your server
- Enter your server administrator credentials:
- Username: admin
- Password: the instance ID for the server
Licensing Your Statseeker Server
Once you have logged into your Statseeker server via the web interface you will be presented with the Statseeker licensing screen.
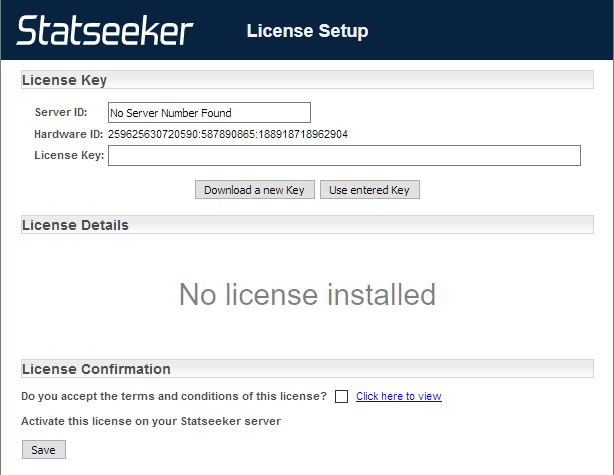
To license your server you will need a Statseeker Server ID, the Server ID is used to produce your License Key. To obtain a Server ID, either:
- Email: keys@statseeker.com
- Contact Customer Support
OR
From this point forward you can follow the standard licensing procedure as described in the Statseeker Installation Guide.