** Legacy Dashboard System **
Statseeker v5.5.0 introduced a new dashboarding system. The legacy system was removed from new installations, but is still available to users upgrading an existing Statseeker server. This documentation is specific to that legacy system.
For documentation relating to the current dashboarding system see Statseeker Dashboards.
Index
- Overview
- Adding, Cloning and Deleting Dashboards
- Rename a Dashboard
- Change the order of Dashboards
- Resize the Dashboard Canvas
- Add/Remove Dashlets
- Resize, Join and Split Dashlets
- Configure Dashlet Content
- Displaying Existing Reports in a Dashlet
Overview
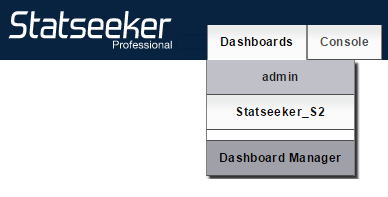
The Statseeker Dashboard is the default view when accessing Statseeker via the web interface. It is an editable view comprised of one or more 'dashlets'. Dashboards can be created and edited from the Dashboard Manager:
- Select Dashboards > Dashboard Manager
Statseeker dashlets can be configured to display:
- Any default Statseeker report
- Any previously configured custom report
- Website content
- Static text
- A clock
Adding, Cloning and Deleting Dashboards
- To Add: click the (+) under Active Dashboards
- To Clone: select an existing dashboard and click Clone
- To Delete: select an existing dashboard and click Delete
A cloned dashboard is identical to its parent except for the name will have _clone_[n] appended.

Rename a Dashboard
A dashboard can be renamed by:
- Selecting the dashboard and clicking Rename

Dashboard names have the following limitations:
- Can only consist of alpha-numeric, space and -_ .^=+% characters
- Cannot be empty/blank (must have a non-space character)
- Cannot start with a number
Change the order of Dashboards
The order in which the dashboards are listed under the dashboards tab can be altered by simply dragging the dashboard titles in the Active Dashboards container.

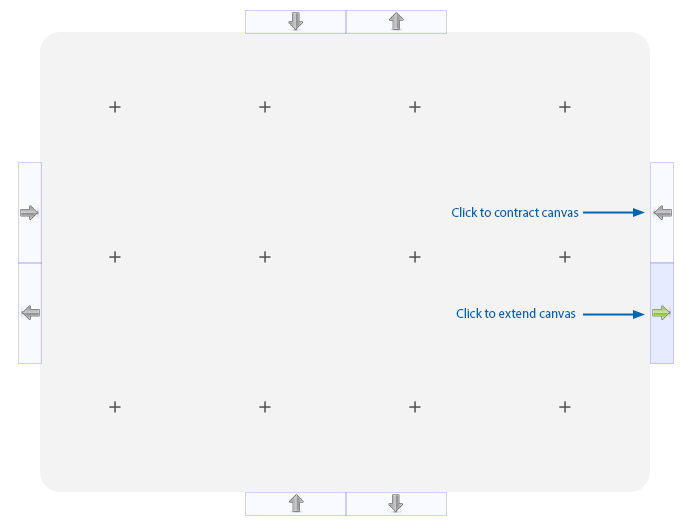
Resize the Dashboard Canvas
To resize a dashboard:
- Select the dashboard and click Configure
- Use the canvas arrows to expand and contract the canvas
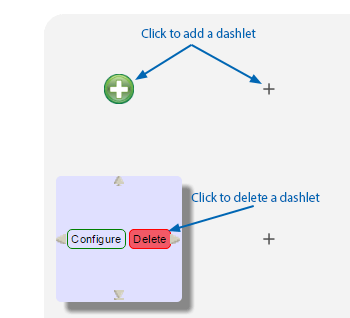
Add/Remove Dashlets
- To Add a new dashlet, click one of the + icons on the dashboard canvas
- To Remove a dashlet, click Delete on the dashlet
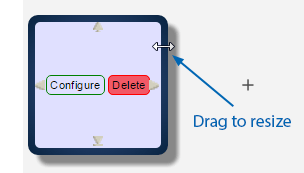
Resize, Join and Split Dashlets
- To Resize a dashlet, simply drag the edge of the dashlet
- To Join a dashlet, click the opposing connectors of two adjacent dashlets. Undo this process to split dashlets.

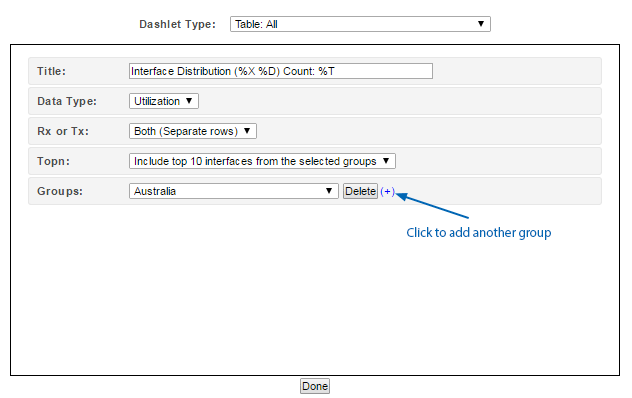
Configure Dashlet Content
To configure a dashlet's contents:
- Click Configure on the dashlet
- Use the text fields and drop-downs provided to configure the contents and click Done
Displaying Existing Reports in a Dashlet
All Statseeker reports, both stock and custom made, are displayed in a browser window. The URL associated with that window contains all the configuration and filtering information required to reproduce that report.
To have an existing report displayed in a dashlet:
- Run that report
- Copy the URL displayed at the top of the window for that report
- Add a new dashlet and set Dashlet Type to Link
- Paste the URL for the report into the Link field
- Set the report Scrolling and Refresh options as required
- Click Done